Developing with LocalStack using the AWS Toolkit for VS Code
The new AWS Toolkit for VS Code integration streamlines your serverless development by connecting directly to LocalStack’s AWS emulator. Seamlessly browse resources, deploy SAM projects, and live debug Lambda functions without leaving your IDE.
Thanks to a collaboration with the AWS Lambda team, users of the AWS Toolkit for VS Code can now connect to LocalStack’s AWS emulator. If you’re a fan of using IDEs to write and debug software, this extension greatly improves your experience. Not only can you browse emulated resources in the AWS Explorer view, but you can deploy your SAM (Serverless Application Model) projects into LocalStack, then perform live debugging of Lambda functions.
In this tutorial, you’ll do the following:
- Install the LocalStack emulator for AWS
- Automatically configure your AWS Profile to access LocalStack
- Start the LocalStack AWS emulator.
- Deploy a SAM application to LocalStack, using the AWS Toolkit’s Application Builder.
- Debug a Lambda function within the AWS Toolkit (this is the local version of a feature that was recently launch by the AWS Lambda team).
Why Local Development?
Developing and Debugging applications locally is a big win, especially if you want faster development cycles, or are concerned about the security and cost of using the cloud.
- Forget about security, and focus on your code - Security is critical when running in the cloud, but all those security checks slow you down when you’re trying to develop and test. This is especially true if your organization has a lot of pre-deployment tests that are required to pass. With LocalStack, you can disable security checks during development, then enable them when you’re ready.
- Forget about cost overruns - Whereas the AWS cloud is billed by how much you use, LocalStack has a fixed monthly cost (including a generous Free Plan). No more worry about out-of-control applications and their resulting AWS bill.
- It’s often faster than the cloud - Because LocalStack stores everything in memory, creation of emulated AWS resources can be much faster than creating them in the cloud.
Of course, these factors are important for developers who want to get their code written and tested as quickly as possible. Using the real AWS cloud is still important for production workloads, where security, reliability, scalability, and elasticity are far more important.
Tutorial: Deploying and Debugging a SAM Application
In this tutorial, you’ll learn how to install the LocalStack emulator for AWS, then use the AWS Toolkit to deploy and debug a small application. We’ll use of one of the standard example applications provided within the AWS Toolkit.
Prerequisites
This tutorial requires the following software to have already been installed:
- If you don’t already have it, you should install a recent version of the VS Code IDE on your local machine.
- Install the latest version (≥ 3.74) of the AWS Toolkit, a VS Code extension published by Amazon.
- If you’re an existing LocalStack user, upgrade to LocalStack v4.8 (or higher) for both your LocalStack CLI and your LocalStack Docker image. If you’re not yet a LocalStack user, you’ll install LocalStack as part of this tutorial.
- Install the latest version of the AWS SAM CLI (this can also be done for you, in Step 1).
- Make sure you have your development environment set up for Python, JavaScript, or Java. This tutorial assumes you can compile/run code in your preferred language.
Step 1: Install the LocalStack Toolkit for VS Code
The first step of this process is to install the LocalStack Toolkit, an extension for VS Code that allows installation and management of LocalStack’s AWS emulator. This is a relatively new extension, but over time we’ll add support for LocalStack’s range of developer experience features.
There are two ways to install the extension.
- Install the LocalStack extension directly from the VS Code Marketplace.
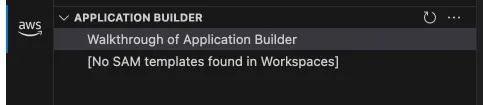
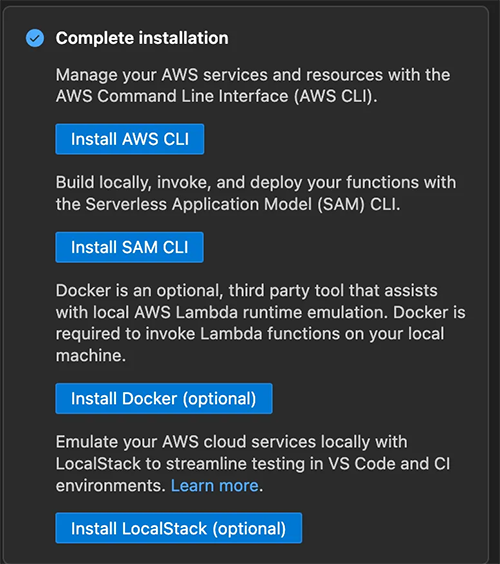
- Or, select the “Install LocalStack” button in the AWS Toolkit. Start by opening the AWS view in VS Code, then navigate to the Application Builder view, then select Walkthrough of Application Builder.
Then click on the Install LocalStack option. This approach might be preferable because it also allows installation of pre-requisites such as the the SAM CLI, and Docker.
Now that you’ve installed the LocalStack Toolkit for VS Code, you’re ready to install the LocalStack AWS emulator.
Step 2: Install the LocalStack Emulator (if you don’t already have it installed )
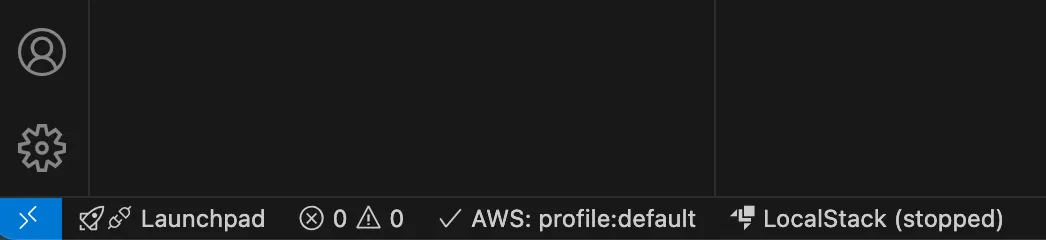
Once the LocalStack Toolkit for VS Code is installed, you’ll see the LocalStack status indicator at the bottom of your VS Code window. If the status is black, you already have LocalStack’s AWS emulator installed correctly. You can skip ahead to Step 3.

But, if the status is red, you should click on the button to initiate the install process.

Select Run LocalStack setup Wizard in the command menu to install the emulator. You might also have been prompted by a “Setup LocalStack to get started” pop-up, which provides a Setup button to run this command.

As part of this installation process, you’ll be redirected to LocalStack’s sign-up web page where you can create a new LocalStack account. If you already have a LocalStack account, then select the Log in link and enter your existing credentials. Once you’ve completed the sign-up process, you’ll be redirected back to VS Code.
As part of the setup, a new localstack profile will have been added to your .aws/config file. If you examine the file, you’ll see the following entry:
[profile localstack]region = us-east-1output = jsonendpoint_url = http://localhost.localstack.cloud:4566and the corresponding entry in .aws/credentials
[localstack]aws_access_key_id = testaws_secret_access_key = testAt this point in time, you should have a complete installation of the LocalStack Toolkit for VS Code, and have the LocalStack emulator (at least v4.8) installed. The emulator won’t yet be running, but we’ll do that after installing the sample application.
Step 3: Install a sample application
To install the sample application, select the ... menu in the AWS Explorer view and choose Create application with Serverless template. Note, there are two ... icons close together in this view.
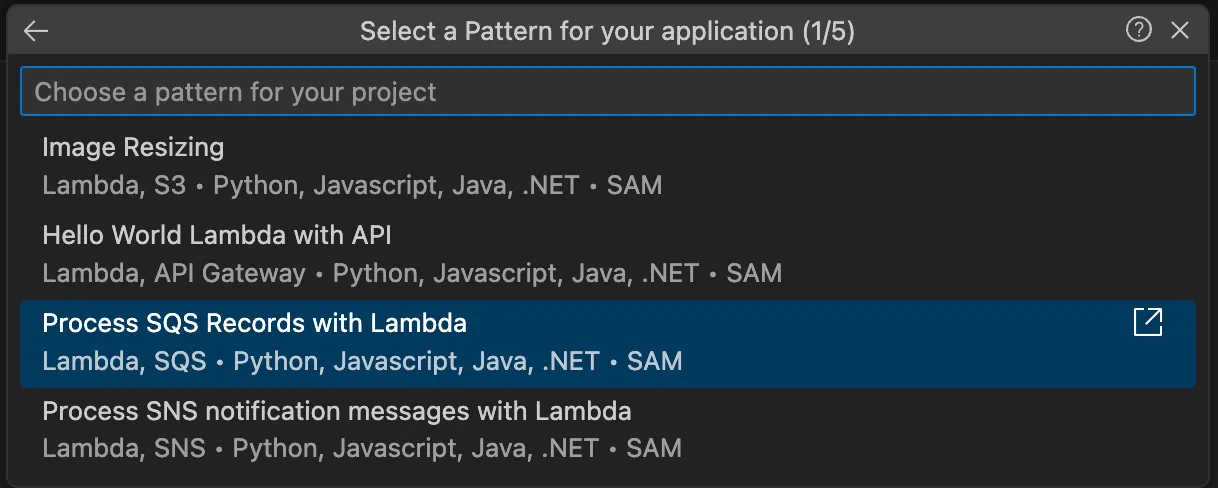
Follow these steps in the wizard:
-
Choose the Process SQS Records with Lambda example.
-
Choose between Python, JavaScript, or Java, based on which language you normally use. All of these run-times are supported by LocalStack, although this tutorial will show Python in future screen shots.
-
Choose sam as the IaC option (the only option available)
-
Select a folder on your local machine where you want the source code to be place.
-
Finally, enter
sqs-lambdaas the application name
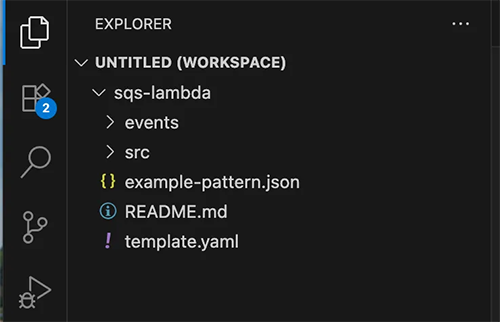
You should now see the source code in the VS Code Explorer view:
Spend a few moments examining the source code, to understand how the application works. An important thing to notice is the SQS queue being used as an event source for the Lambda function. This will be relevant in a later step.
Step 4: Start LocalStack and set the AWS Profile
Now we’re ready to deploy the application to the LocalStack AWS emulator. The first step is to start the emulator running. You should see the stopped status in the LocalStack status icon. Click on the icon, then choose Start LocalStack from the command menu.
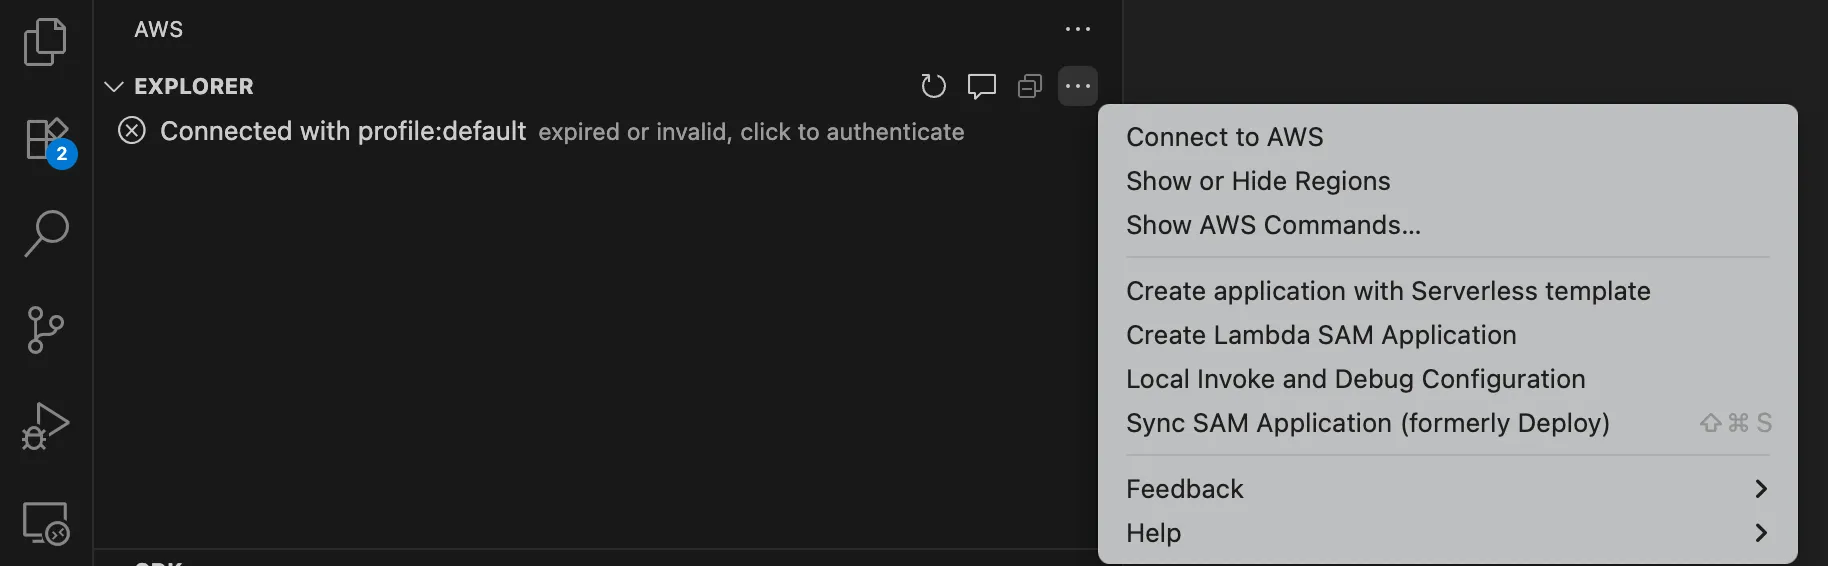
Next, switch to the localstack AWS profile by clicking on the AWS: profile status icon. Choose the profile:localstack entry from the connection menu:
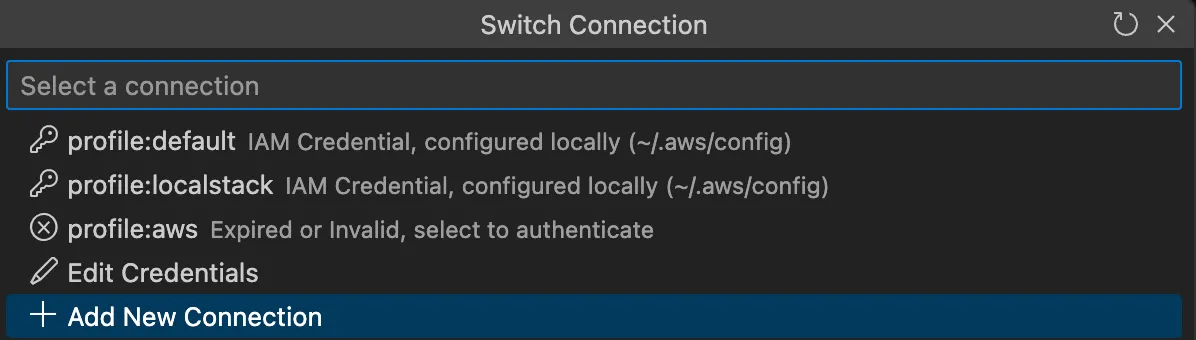
The status indicator will show that you’ve successfully selected the localstack profile.
Step 5: Deploy the application to LocalStack
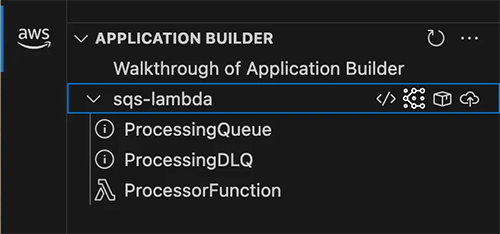
Now that you’re fully connected to LocalStack, and the application source code is in your local workspace, switch to the AWS view in VS Code and find the Application Builder section. You’ll see the application has been recognized, along with a brief summary of the AWS resources.
To deploy the application to LocalStack, click on the Deploy SAM Application icon (the icon shaped like a cloud), or select that command from the context menu.
In the wizard, follow these steps:
- Select Deploy to do a full deployment.
- Select Specify requirements parameters and save as defaults
- Select
us-east-1(although LocalStack emulates all regions, the AWS Toolkit doesn’t show them all by default). - Select
sqs-lambda-stackas the name of the new stack. - Select Create a SAM CLI managed S3 bucket
In the VS Code Terminal window, you’ll now see the SAM deployment taking place. This should complete quickly, since all resources are deployed in the emulator, not in the cloud. Notice that all the resource ARNs are for account 000000000000 which is the default account for LocalStack (this is flexible, and cross-account applications are possible).
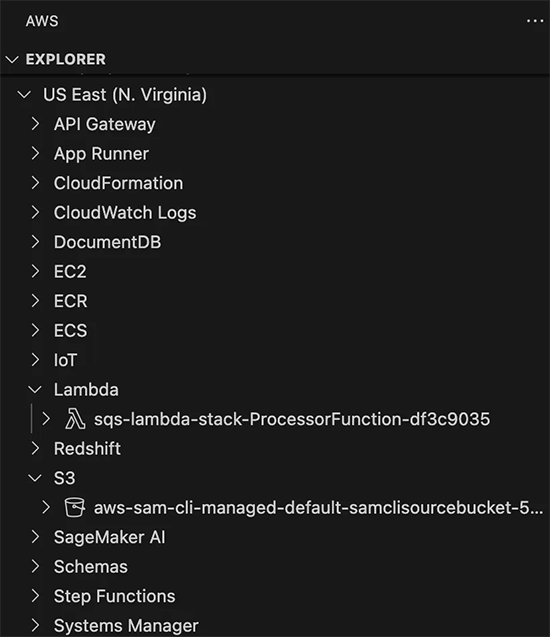
To confirm successful deployment, switch to the AWS Explorer view, and verify the resources are available in us-east-1:
Step 6: Debug the Lambda Function
At this point, you’ll have the application deployed to the LocalStack emulator. The final step in this tutorial is to invoke the Lambda function with debugging enabled so we can set a breakpoint and inspect the function’s variables.
Start by examining the Application Builder section again to see that the Lambda function has been deployed (you might need to press the refresh button to see the new resources).
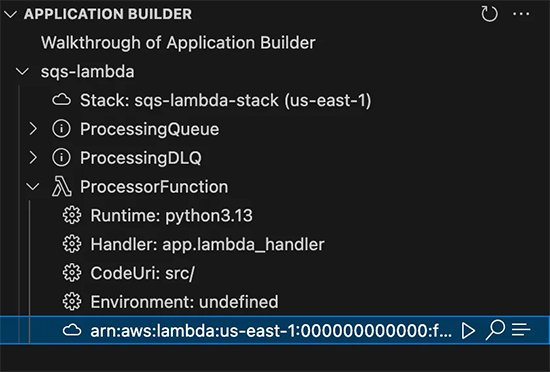
Next, select the ARN of the Lambda function (the last line of the above screen shot) and choose the Invoke Remotely icon (or from the context menu). You’ll be presented with the Remote invoke configuration view.
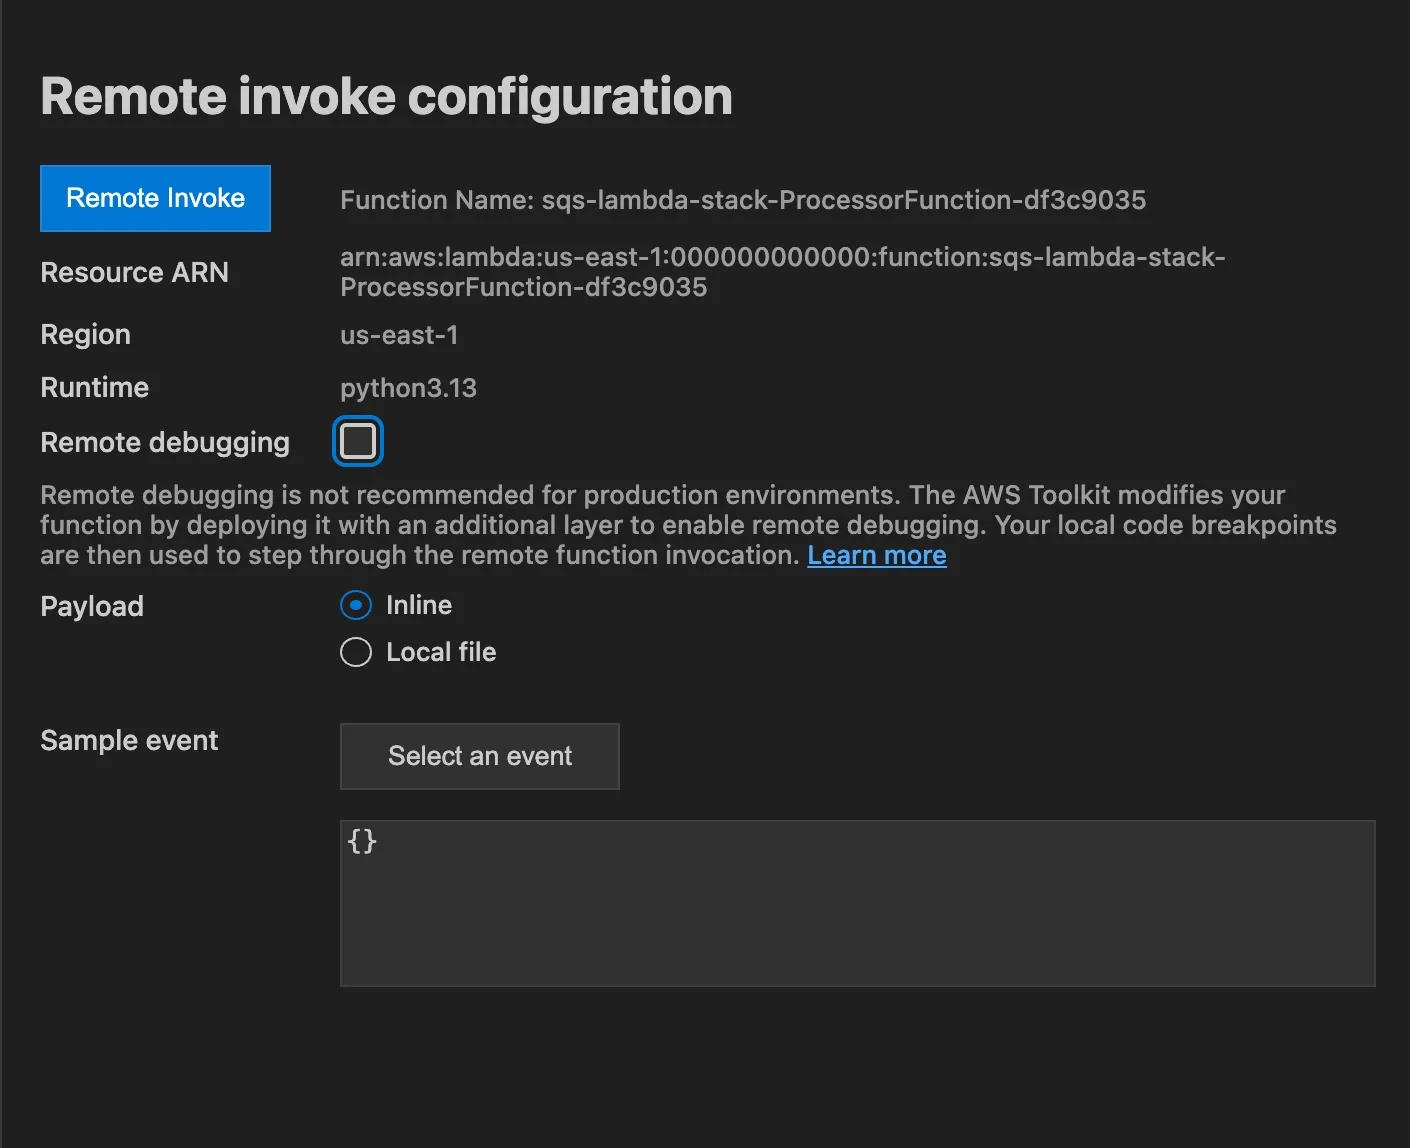
On this page, select the Remote debugging checkbox (if you skip this step, the function will run to completion without stopping at breakpoints). You should now be presented with the source code of the function being debugged, alongside the Remote invoke configuration window.
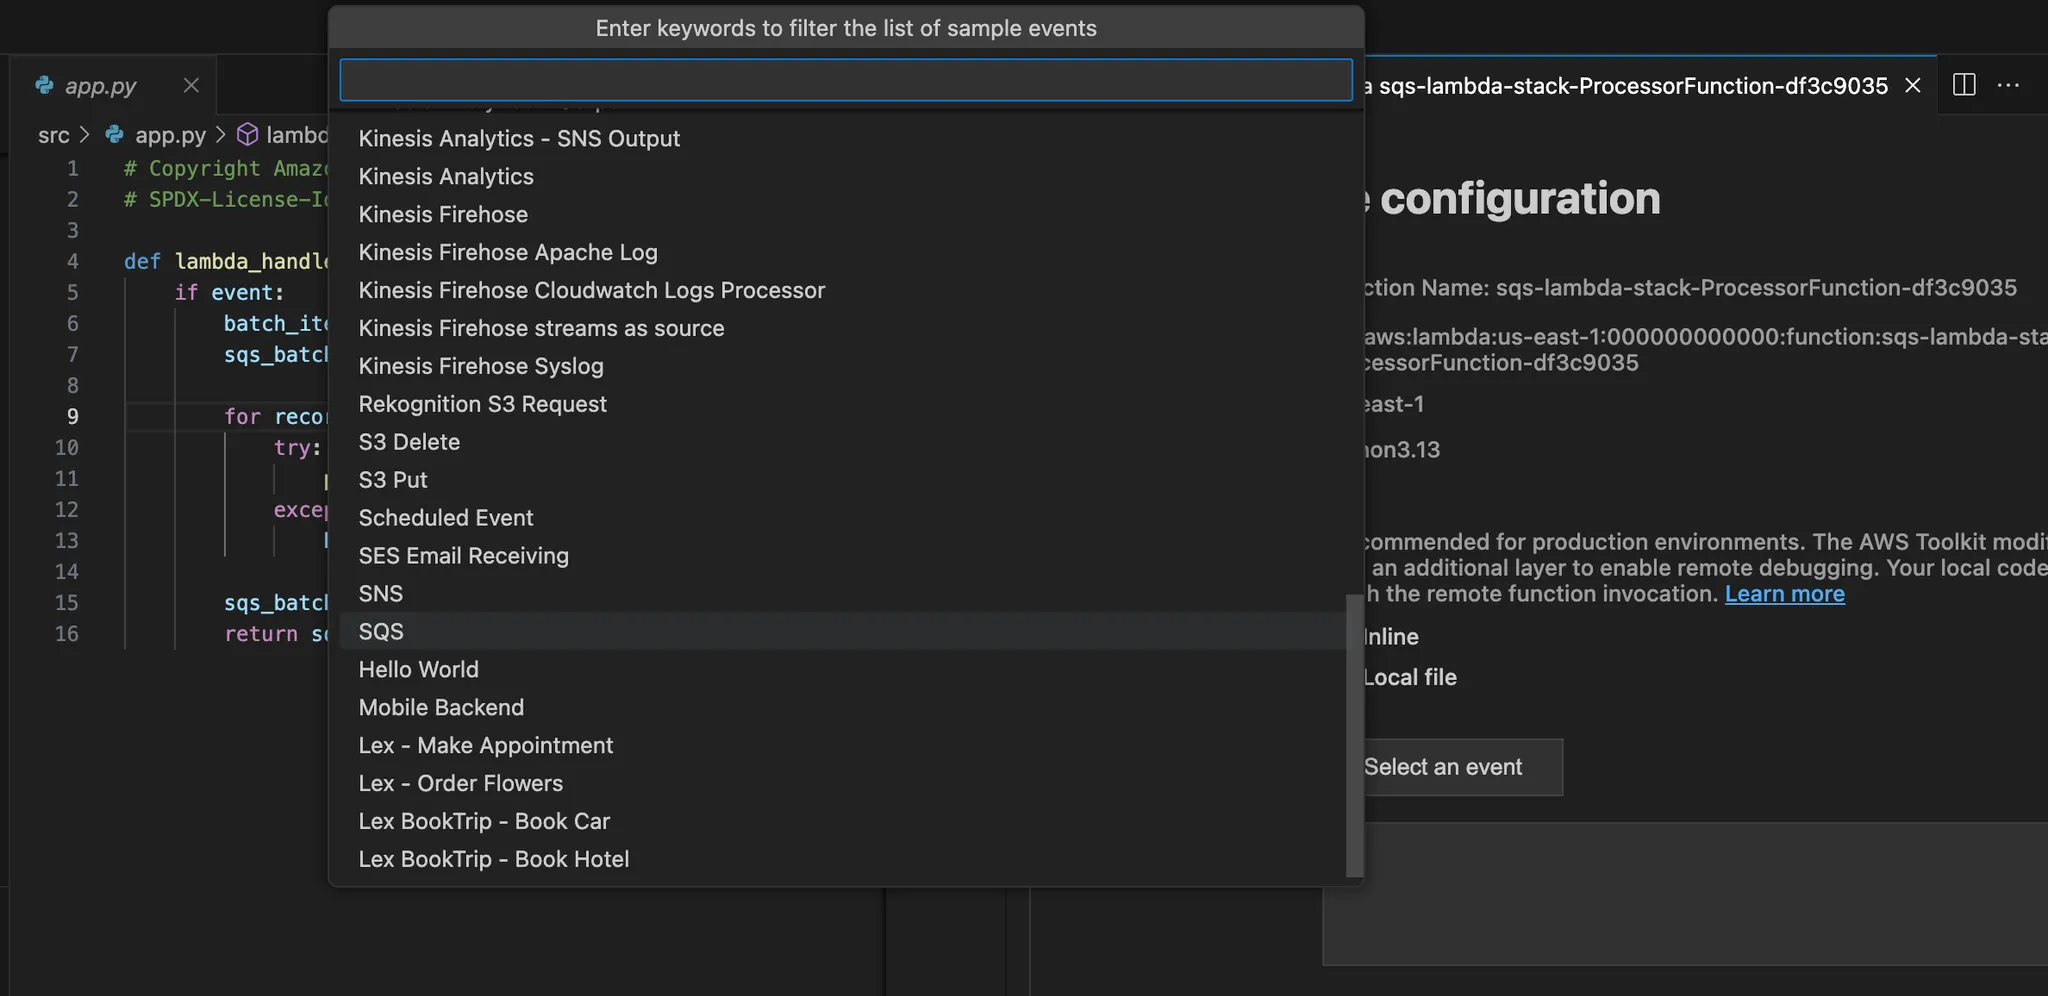
In our application, the Lambda function is triggered by messages arriving on an SQS queue, we must provide a similar-looking input payload. To do this, choose the Select an event button, then choose SQS from the pull-down menu. This populates the Sample event field with a suitable input payload:
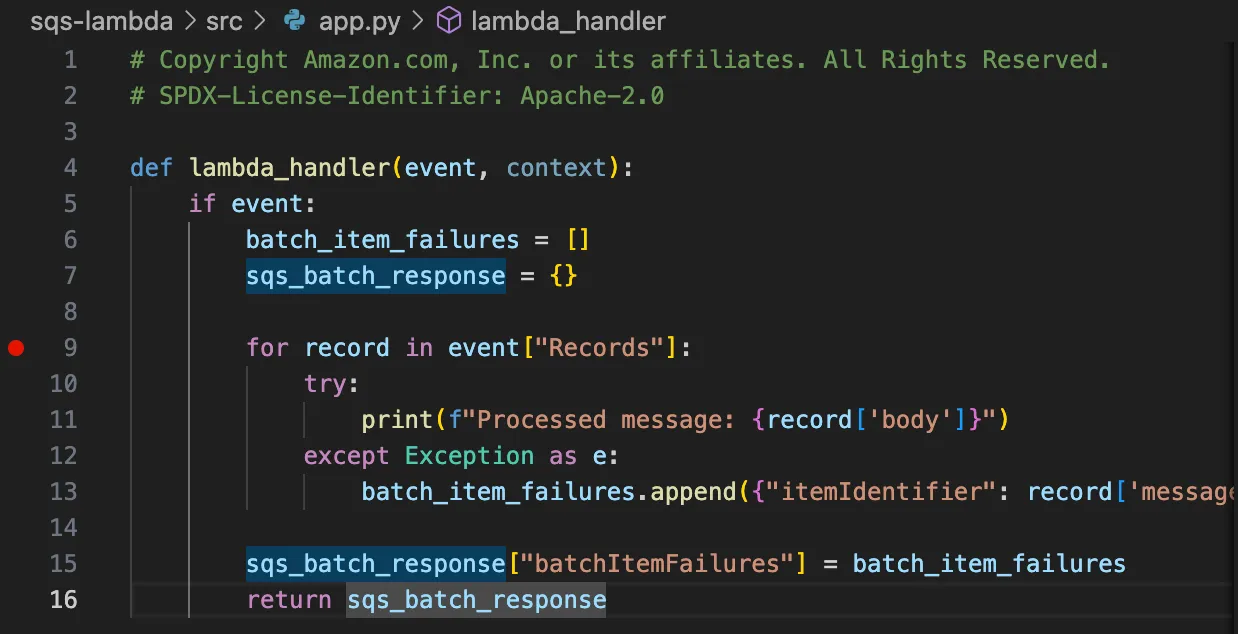
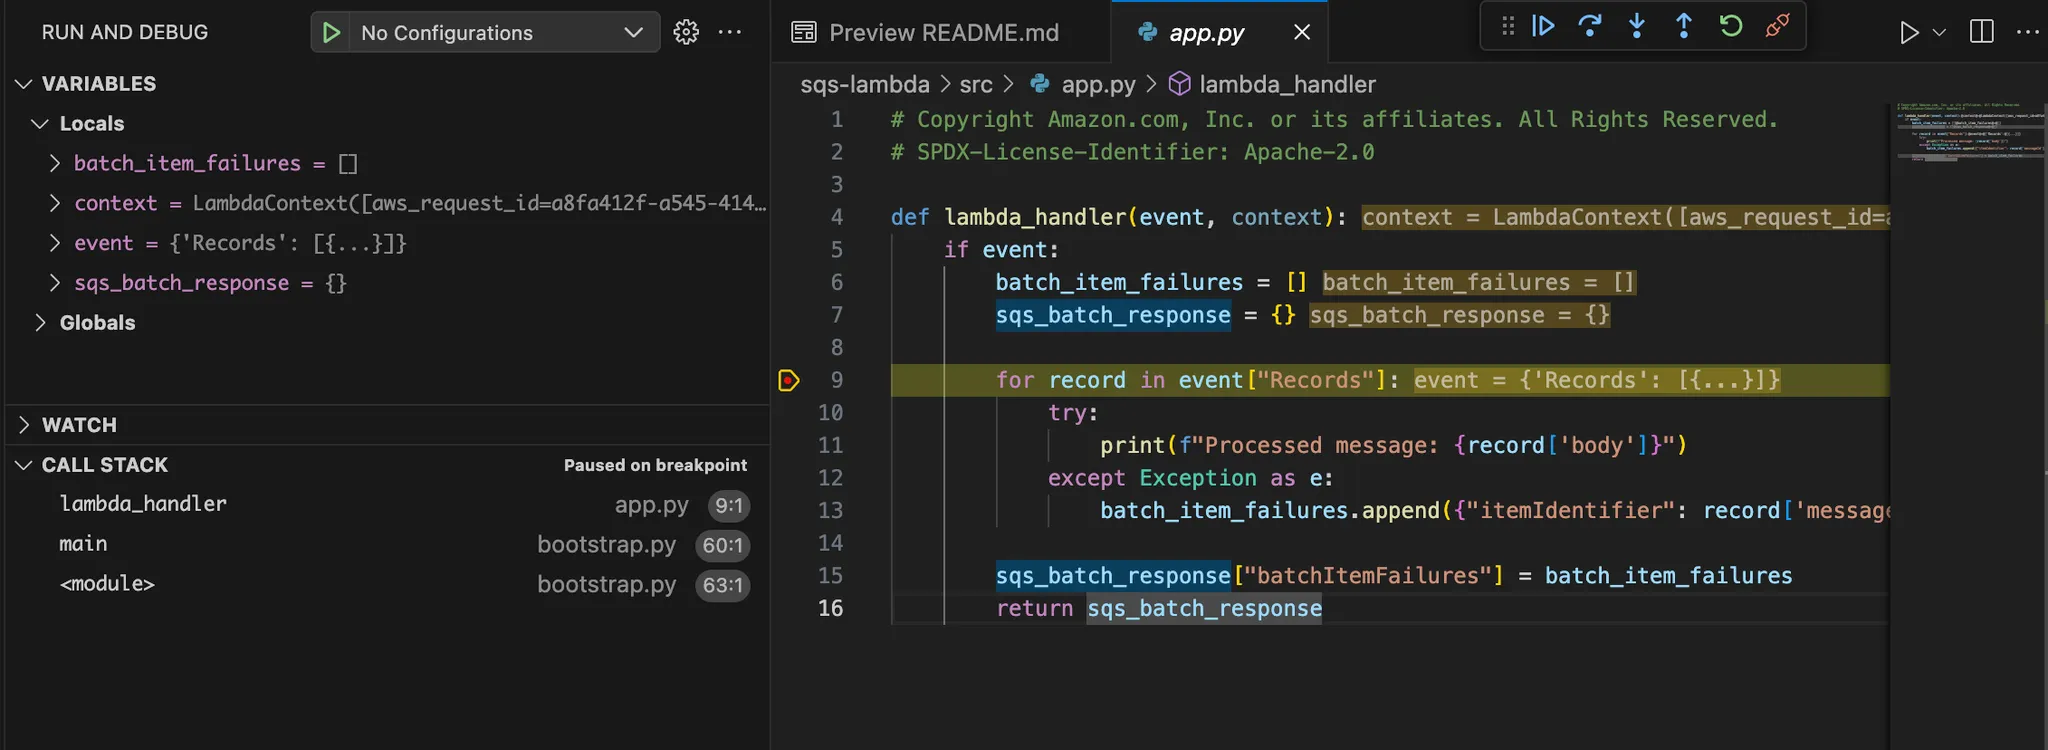
In the same editor window, you’ll see the source code for the Lambda function (in our case, I chose Python). Click in the editor’s margin to set a breakpoint at the start of the for loop:
Finally, choose the Remote Invoke button on the Remote invoke configuration tab. A few seconds later, the Lambda function will execute, and the breakpoint will be reached. You can now single step, set additional breakpoints, inspect variables, or continue, as you’d normally expect to.
Summary
Local development with LocalStack is now easier than ever! The AWS emulator supports 100+ AWS services, while allowing the developer to avoid the mandatory security checks of the cloud, or the potential cost overruns associated with consumption-based billing.
In this tutorial, you’ve seen the newly-added support in the AWS Toolkit for accessing LocalStack, simply by adding a standard AWS profile. You’ve also seen how LocalStack supports the same Lambda Remote Debugging feature recently launched by AWS.
All of this is available with a Free (forever) version of the LocalStack AWS emulator. If you’d like to learn more, please check out our Sample Applications that illustrate some of LocalStack’s advanced features. To provide feedback on the LocalStack Toolkit for VS Code, please visit the extension’s GitHub Page, or join our Community on Slack.