AWS Deep Dives - SES (Simple Email Service)
Amazon SES (Simple Email Service) is a fast and cost-effective way to send bulk or programmatic emails from your application. This post explores how to get it set up on AWS and how to build and test an email workflow locally using LocalStack.

AWS is massive. There are literally hundreds of services available! So much so that it can sometimes be tough to figure out what each piece is and does or how it fits into your application. This is the first in a series of posts where we’ll dig into specific AWS services in depth with the goal of helping you understand how they work (and how to test them on LocalStack).
SES is short for Amazon Simple Email Service. In terms of AWS product naming, it’s among the most straightforwardly descriptive (though I can never figure out the underlying logic behind some services being AWS and others Amazon). As the name implies, it is a cloud service for sending and receiving emails. (The “simple” part may be a matter of perspective, I suppose.) Let’s dig into some of the specifics about what it does, how it works, and how to develop and test SES within LocalStack.
SES Basics
I have a lot of confidence that, as someone who is clearly old enough to read something on the internet, you don’t need me to explain how email works. SES, in simplest terms, allows you to bulk send a lot of these programmatically. So whether you are sending transactional emails based upon account actions, for example like a password reset, or bulk sending marketing emails, you can use SES for these purposes.
However, SES is not a full replacement for services like MailChimp, MailJet and others because it does not include built-in WYSIWYG templating or marketing automations. You can send formatted emails using HTML via SES, but the formatting aspect is up to you. You can even define templates (including using Handlebars), but these templates are defined in code and a far cry from what you’d expect from a marketing email system.
Getting Started
I probably don’t need to tell you that bulk emailing systems have the potential to be misused. This is why getting started with SES requires that you go through a number of verification steps before you can actually start sending emails.
Initial Setup
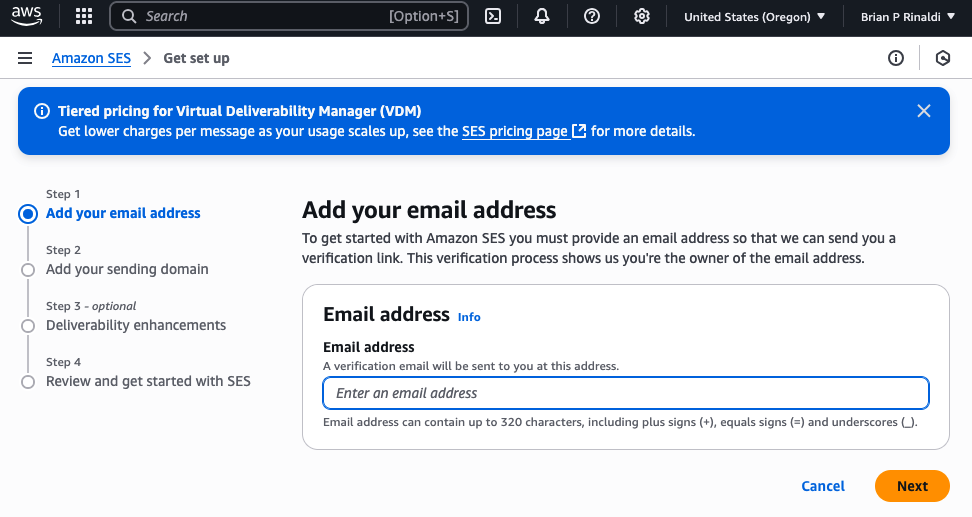
First, use the multi-step setup wizard to set up the email you want to send from.
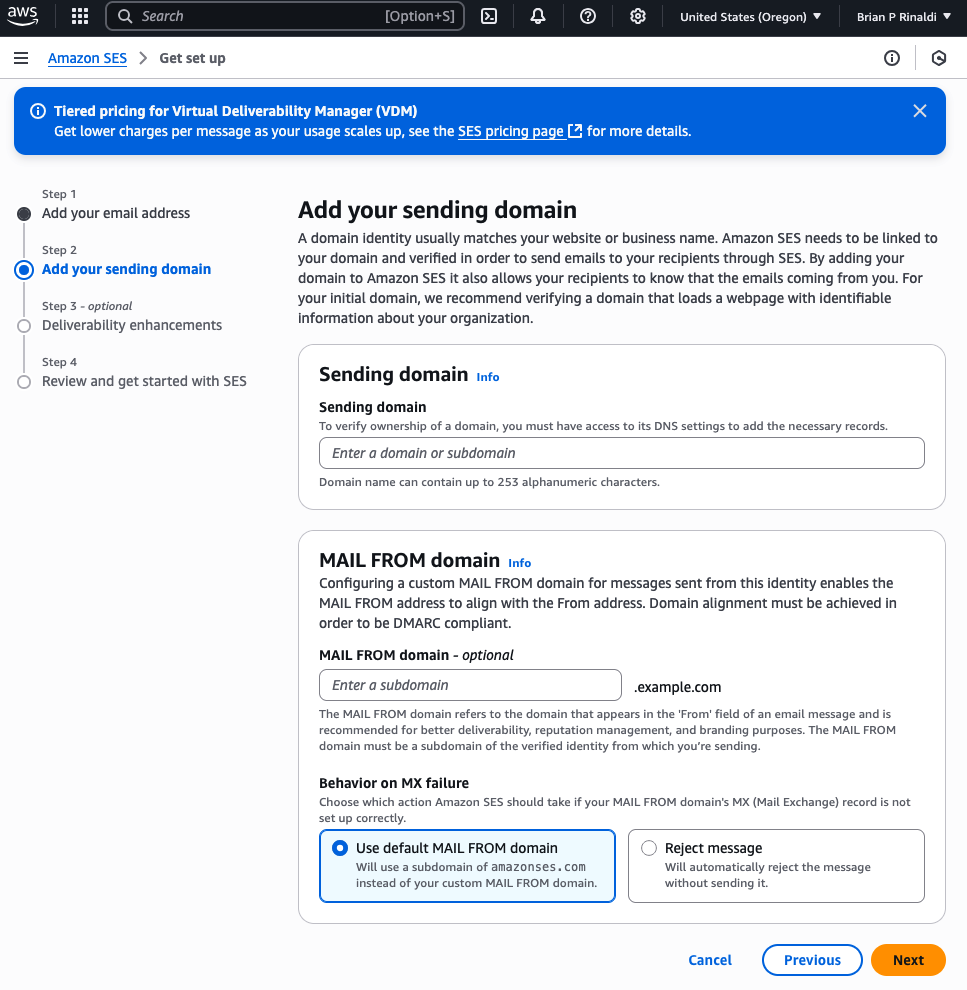
Next, establish what domain you will be sending from.
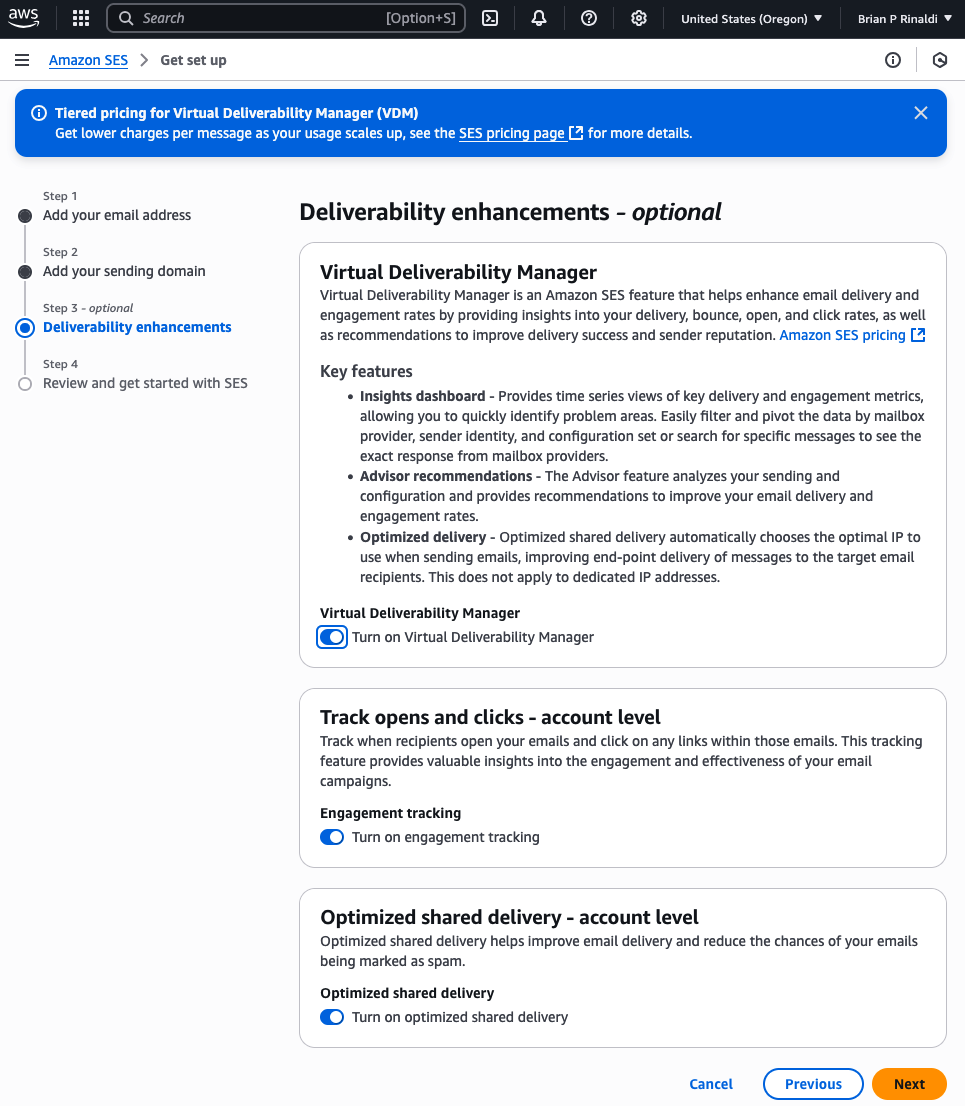
After that, you’ll be asked if you want to enable deliverability enhancements. I am going to assume that, in most cases (other than perhaps some transactional emails), you will want to do this. In particular, this is because it will allow you to track when an email was delivered and if links were clicked. It also has features to help reduce your email being caught as spam. Nonetheless, these features don’t come for free (I’ll discuss pricing later in this tutorial).
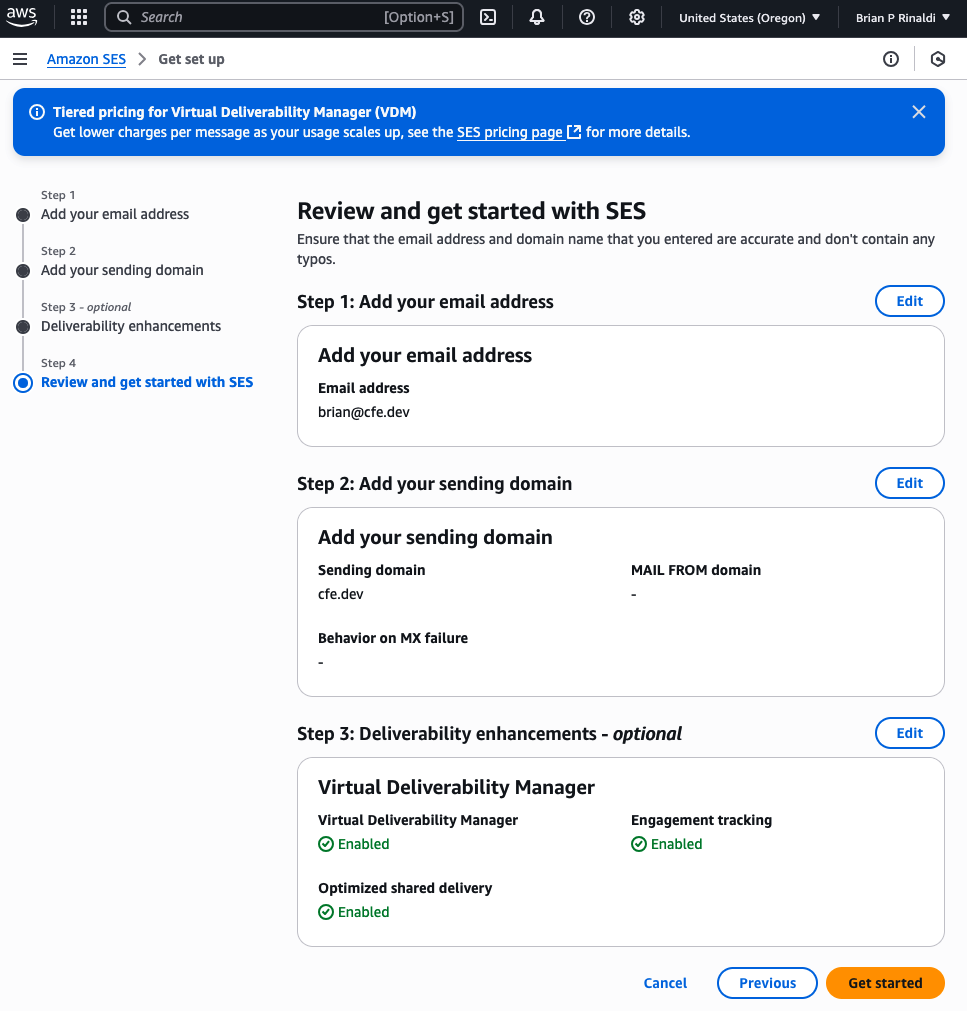
The final step confirms your settings.
You are not quite done yet though.
Email and Domain Confirmation
At this point you’ll need access to the sending email and your DNS settings for the sending domain.
Confirming the email is pretty simple. It’s the usual process of clicking the link in a confirmation email sent to the sending address.

The next step is trickier as you’ll need access to the DNS settings for your sending domain. If you have that access, you’ll just need to add provided DNS records.
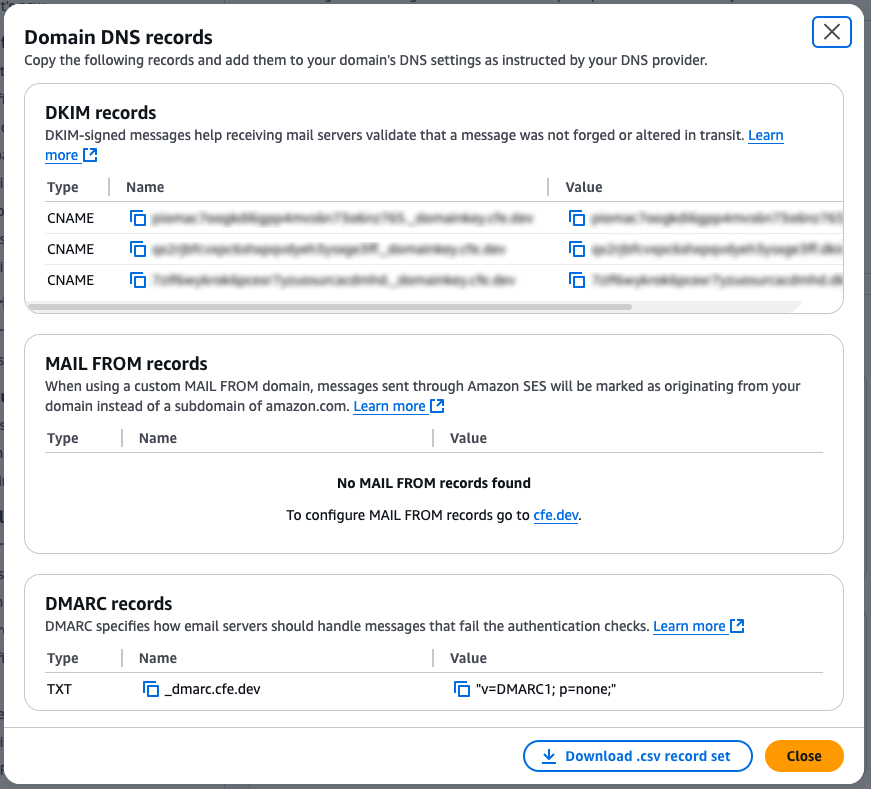
Once the system sees these settings in your DNS records, it should automatically confirm.
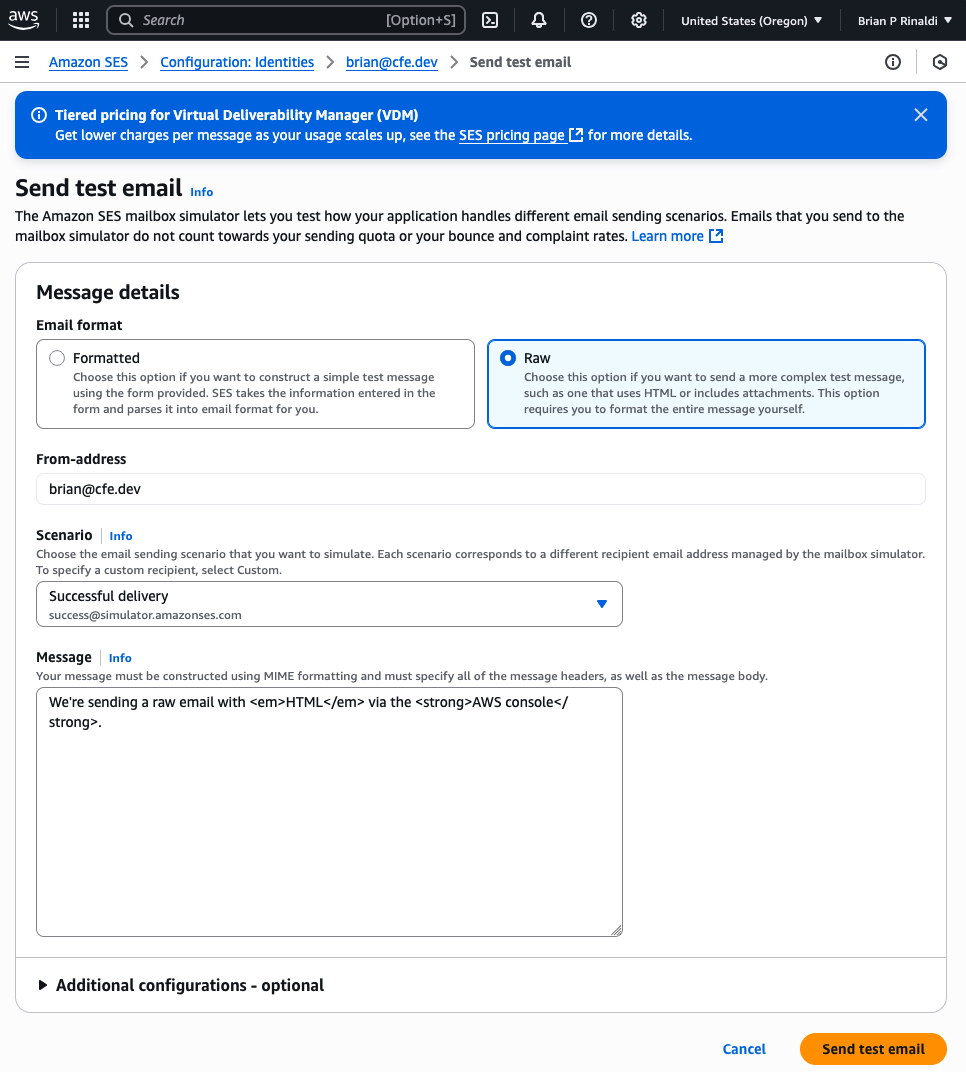
At this point, you can also send a test email if you’d like. You are still using the Sandbox which has a strict limit of 200 emails per day and this test will count against that limit.
If you’d like to get production access for full sending capabilities, you’ll need to request it and share details of your intended usage.
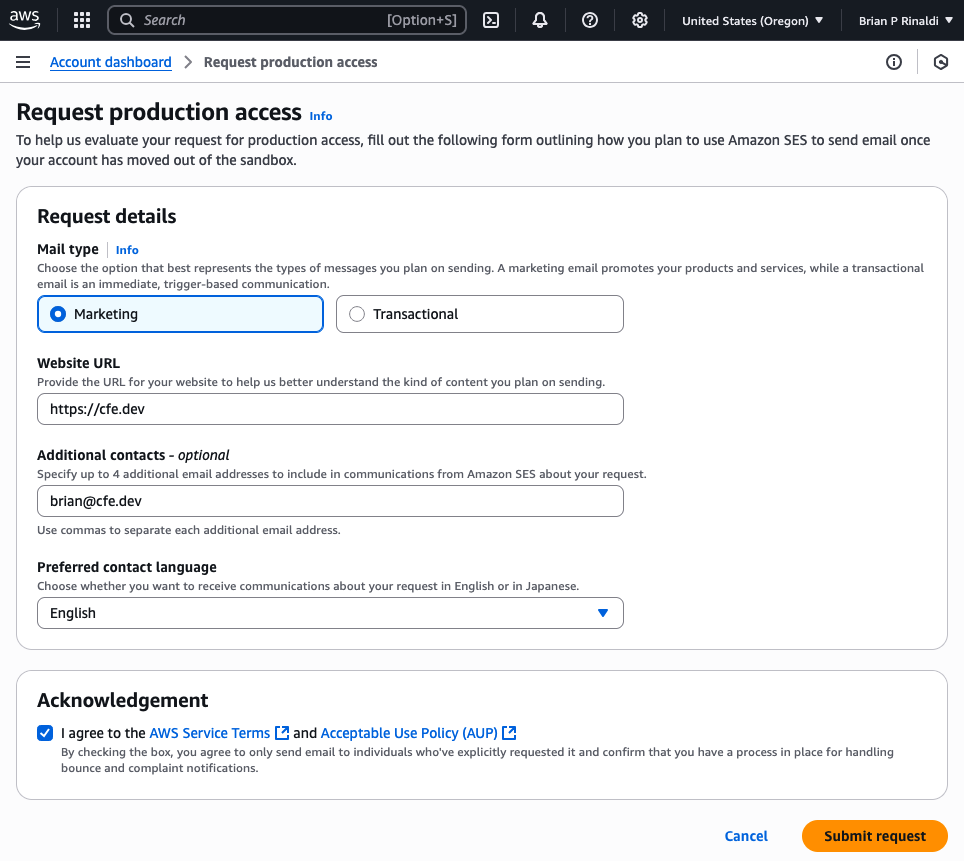
You are probably not quite done yet. In my experience, this triggered a support case requesting additional details including questions about how frequently you send emails, how the list was collected, and how it is managed (especially unsubscribes, bounces, and complaints). In addition, where relevant you may need to provide examples of prior emails. This process can take a few days to complete, but was reasonably quicker than expected (I submitted my request on Friday and had approval by Monday).
It’s worth noting that SES does offer subscription management capabilities that you can utilize to manage the unsubscribes, so you do not need to stand up these capabilities on your own.
SES Costs
If you are used to services like MailChimp, you’ll be happy to know that you don’t pay on a per subscriber basis for SES (which, for many services, frustratingly even includes your unsubscribes). Instead, SES charges on the basis of how many emails you send (or receive).
Pricing for SES starts at $0.10 per 1,000 emails sent. The price per email increases depending on the add-ons you require. For example, I intend to utilize the Virtual Deliverability Manager, which will add an additional $0.07 per 1,000 emails for the first 10 million emails I send (for what it’s worth, I have no need to send 10 million emails). Therefore, my price will be $0.17 per 1,000 emails.
For comparison’s sake, I currently spend a minimum of $55/mo for Mailjet, which allows me up to 50,000 emails per month. I personally rarely hit that target, but even if I did, the cost on SES would be $8.50/mo.
Now, to be fair to Mailjet, they are fairly inexpensive by comparison to other offerings and are a full marketing email suite with many additional features including marketing automations, A/B testing, landing pages and more. So it really depends on the extent of your needs. If you want these kinds of features with SES, you’re going to have to create them. SES is a great solution if you intend to send bulk emails from within your application, but, in most cases, it likely isn’t an ideal solution for email marketing.
Using SES
While you can use SES via the console, as I showed earlier in the test email, you’ll most likely be sending emails programmatically within your application. In this section, we’ll explore how to use the SES APIs to send an email.
SES v1 vs SES v2
First, it’s important to point out that SES released a v2 of its API back in 2020. You can still use SES v1 today, though it’s generally recommended that you use v2 for new projects. Let’s look at some key differences:
- Probably the most critical difference is that v2 Increased the maximum message size from 10Mb to 40Mb for both sending and receiving (including attachments).
- v2 added programmatic support of the Virtual Delivery Manager, which was previously only available in the console.
- v2 simplified the API by combining multiple commands to make it easier to use.
- Also important is that, SES v2
SendEmailmeets Google and Yahoo’s inbox protection requirements.
Example
Let’s walk through creating a simple example that we’ll build using AWS CLI commands. We’ll be using LocalStack for this example so we will use awslocal instead of aws, but all of the commands and flags are otherwise the same. The huge benefit here is that we can test all of this without any need for actual email verification or production access and without using up any of the test emails AWS provides.
Once everything works, you can just change the awslocal commands to aws and deploy the real thing to AWS for testing.
awslocalis LocalStack’s thin wrapper around the AWS CLI that allows you to deploy resources to LocalStack without providing an endpoint URL for every command. For more details on installation and usage, refer to ourawslocaldocumentation.
Before getting started, you’ll also want to install LocalStack’s MailHog Extension on your LocalStack instance via the Extensions Manager. We’ll discuss this in more depth later on in the tutorial.
Setting Up an SNS Topic
You may be wondering why we are starting with SNS for a tutorial showing how to set up SES. In case you are unaware, SNS is AWS’s notification service. Let me explain.
Emails sent via SES can generate events for things like bounces, complaints, and deliveries. Setting up a destination for these events, whether it is SNS, CloudWatch or Kinesis Firehose, can prevent them from going unnoticed. Here are the types of events that SES may generate:
send: SES is attempting to deliver the email.reject: SES determined that the email contained a virus and rejected it.bounce: This is a “hard bounce” where the recipient’s mail server permanently rejected the email.complaint: The recipient marked the email as spam.delivery: SES successfully delivered the email.open: The recipient opened the email.click: The recipient clicked one or more links in the email.renderingFailure: SES did not send the email because of a template rendering issue.
Let’s start by creating the SNS topic. For purposes of example, I’ve given it a generic name and display name:
awslocal sns create-topic --name create-sns-topic --attributes DisplayName="SES Events Topic"This will return the TopicArn which we’ll need for the next steps.
Create and Configure a SES Configuration Set
Configuration sets define the rules that SES will apply when sending emails via your verified identities (i.e. your verified domain or email). In our case, we’ll want to create a configuration set in order to enable reputation metrics (which I touched on briefly earlier) as well as set the SNS topic destination.
awslocal ses create-configuration-set --configuration-set Name=sample-ses-config-setNow that the configuration set is created, we can enable reputation metrics.
awslocal ses update-configuration-set-reputation-metrics-enabled \ --configuration-set-name sample-ses-config-set \ --enabledFinally, let’s connect our configuration set to the SNS topic we created above. Note that you will need to replace <TopicArn> in the command below with the TopicArn returned earlier.
awslocal ses create-configuration-set-event-destination \ --configuration-set-name sample-ses-config-set \ --event-destination Name=ToSns,Enabled=true,MatchingEventTypes=send,reject,bounce,complaint,delivery,open,click,renderingFailure,SNSDestination='{TopicARN=<TopicArn>}'Our example above subscribes to all the possible events, which can potentially generate a lot of messages, so be sure to modify that to include only the events you want receive notifications about.
Subscribe to the SNS Topic
At this point, SES will send events to SNS but nothing will happen as nothing is subscribed to the SNS topic. Let’s go ahead and add an email subscription to the SNS topic to notify us via email whenever one of these events succeeds. You’ll need to replace both <TopicArn> and <EmailAddress> with the email that should receive the notifications.
awslocal sns subscribe --topic-arn <TopicArn> --protocol email --notification-endpoint <EmailAddress>This will return a SubscriptionArn that we will need in a moment.
It’s important to point out that email is just one of the options for subscribing. If you are setting this up outside the context of this example, be sure to choose the option that best suits your needs.
If we were using real AWS right now, this subscription would trigger an email confirmation to the address provided. However, we’re working locally, so let’s take a few extra steps to confirm the email so that the subscription is complete, starting with retrieving the token that would have been used to confirm the subscription. Be sure to replace <SubscriptionArn> with the SubscriptionArn returned by the prior step.
curl "http://localhost:4566/_aws/sns/subscription-tokens/<SubscriptionArn>" | jq -r '.subscription_token'This will return a subscription token that is a long string of numbers and letters. We’ll need that for the final step here, which is to manually confirm the subscription replacing both the <TopicArn> and the <SubscriptionToken> with their appropriate values:
awslocal sns confirm-subscription \ --topic-arn <TopicArn> \ --token <SubscriptionToken>Verify the Email Identity
As explained above, AWS has a process for getting your domain or email verified to send emails. In real AWS, you may choose to trigger the email (or domain) verification process via the AWS Console, but in our case, we’re going to trigger it via the CLI. Be sure to replace <EmailAddress> with the address you need verified.
awslocal ses verify-email-identity --email-address <EmailAddress>Since we’re using LocalStack instead of a real AWS environment, this verification process is automatic.
Sending Emails
Whoo boy! That was a lot of steps to get to actually sending emails right? It really puts the “simple” in Simple Email Service.
Joking aside, once this setup is all done, we won’t need to repeat it. We can send emails as needed using the resources that have already been set up. So let’s do that! We will need the configuration set name (sample-ses-config-set in our example) and verified email address (<EmailAddress>) from the prior step to do this via the AWS CLI.
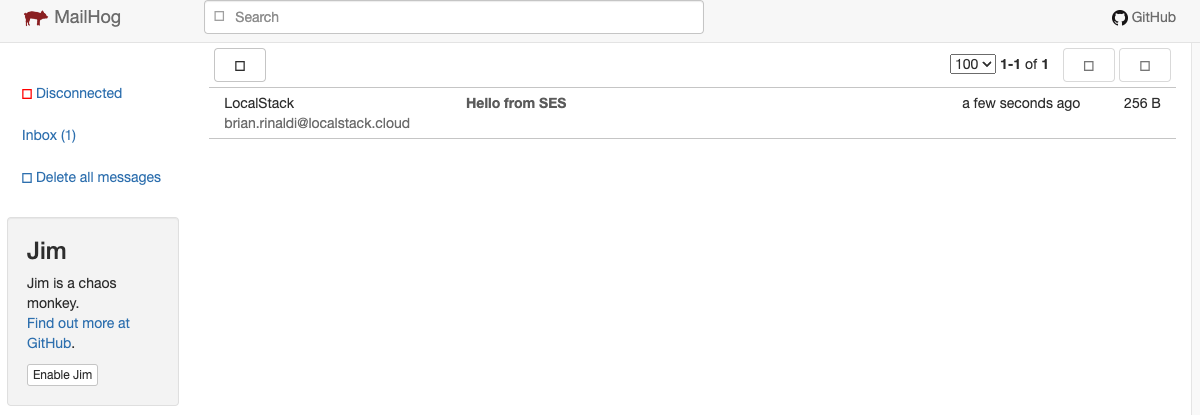
awslocal ses send-email \ --from brian.rinaldi@localstack.cloud \ --destination ToAddresses=brian@localstack.cloud \ --message Subject='{Data="Hello from SES",Charset="UTF-8"}',Body='{Text={Data="This is a simple email message sent from SES",Charset="UTF-8"}}' \ --configuration-set-name sample-ses-config-setAssuming this message is successfully sent, we should receive a MessageId. Within LocalStack, the easiest way to view these is using our MailHog extension. We can install the extension to our LocalStack instance via the Extensions Manager in the LocalStack console.
Once the extension is installed, we’ll actually be able to preview any messages sent via SES. Typically the URL is http://mailhog.localhost.localstack.cloud:4566/.
Example Repository
I’ve wrapped all of these examples into a Makefile to allow you to easily run these commands yourself. You can view the file and instructions on usage in our LocalStack GitHub samples.
LocalStack Support
The good news is that, as you saw above, you can fully emulate sending of emails in LocalStack, including the ability to preview the sent emails. LocalStack has pretty broad coverage for SES v1 – with support for 44 of SES v1 APIs as of this writing – and the majority of these APIs are supported in the free plan.
Currently, LocalStack supports about 10 APIs in SESv2, which require a paid subscription. You can sign up for a free LocalStack account to get started.
Some limitations to be aware of are:
- It is currently not possible to receive emails via SES in LocalStack.
- All operations related to Receipt Rules are mocked.
- It is currently not possible to trigger the unsubscribe, bounce, and complaint events tracked in this example.
Additional Resources
I hope you found this introduction helpful. If you are looking to learn more about SES, here are official documentation resources and other blog posts that you may find useful:
- Getting started with Amazon Simple Email Service (AWS documentation)
- Simple Email Service (SES) (LocalStack documentation)
- Local Testing of SES Workflows Using LocalStack & MailHog Extension (LocalStack blog)
- How to Set Up AWS Simple Email Service (FreeCodeCamp)
- Amazon SES for Dummies (Mailtrap blog)