Introduction
Testing authentication locally is awkward. You need an identity provider running somewhere, your Lambda functions need to validate tokens against it, and your API Gateway needs to enforce authorization. Most teams either point at a shared dev identity provider (which drifts and conflicts with other developers) or skip auth in local testing entirely.
We built a Keycloak extension for LocalStack that starts Keycloak alongside your emulated AWS services, pre-configures a realm and client, and registers Keycloak as an OIDC provider in IAM. Your Lambda authorizers validate JWTs from Keycloak, your API Gateway enforces token-based access, and you test the full authentication flow locally with no external dependencies.
In this post, we’ll install the extension, walk through how it works, and deploy a sample application: a user management API built with API Gateway, Lambda, and DynamoDB, protected by Keycloak JWT authorization with role-based access control.
What is Keycloak?
Keycloak is an open-source identity and access management solution maintained by Red Hat. It supports OAuth 2.0, OpenID Connect (OIDC), and SAML 2.0, and gives you a ready-made auth server with a management console, user and role management, client registration, and token issuance.
You create a realm (a tenant), define clients (your applications), assign roles, and Keycloak handles issuing and signing JWTs that your services can verify independently. It runs as a standalone server, which makes it a good fit for container-based development workflows.
Why run Keycloak as a LocalStack Extension?
LocalStack Extensions let you run additional services inside the same environment as your emulated AWS resources, sharing the network and lifecycle. Start LocalStack, and Keycloak comes up automatically. The extension creates a default realm (localstack), registers a client (localstack-client), assigns roles, and wires up Keycloak as an OIDC provider in LocalStack’s IAM. Lambda functions can reach Keycloak at keycloak.localhost.localstack.cloud:4566 while the rest of your app talks to API Gateway, DynamoDB, and other AWS services on the same local endpoint.
Running Keycloak as an extension gives you:
- No separate Docker Compose or multi-container orchestration for auth. Install the extension once, and Keycloak runs whenever LocalStack runs.
- Lambda authorizers and compute services reach Keycloak directly on the same local network.
- Fresh Keycloak instance with each LocalStack restart, keeping integration tests deterministic.
- Pre-configured realm, client, roles, and OIDC provider registration, so you can start issuing and validating tokens immediately.
- Full offline development and testing of OAuth2/OIDC flows without external identity provider credentials.
How to use the Keycloak extension for LocalStack
Let’s set up the extension and deploy a sample application with JWT-based authorization.
Prerequisites
Before starting, make sure you have the following installed:
- Docker
- LocalStack CLI with a valid LocalStack Auth Token (available with a free LocalStack account)
- Python 3.10+
- AWS CDK with
cdklocalwrapper script - AWS CLI with the
awslocalwrapper script jq
Start your LocalStack container with your LOCALSTACK_AUTH_TOKEN environment variable set:
export LOCALSTACK_AUTH_TOKEN=your-auth-tokenlocalstack startStep 1: Install the Keycloak extension for LocalStack
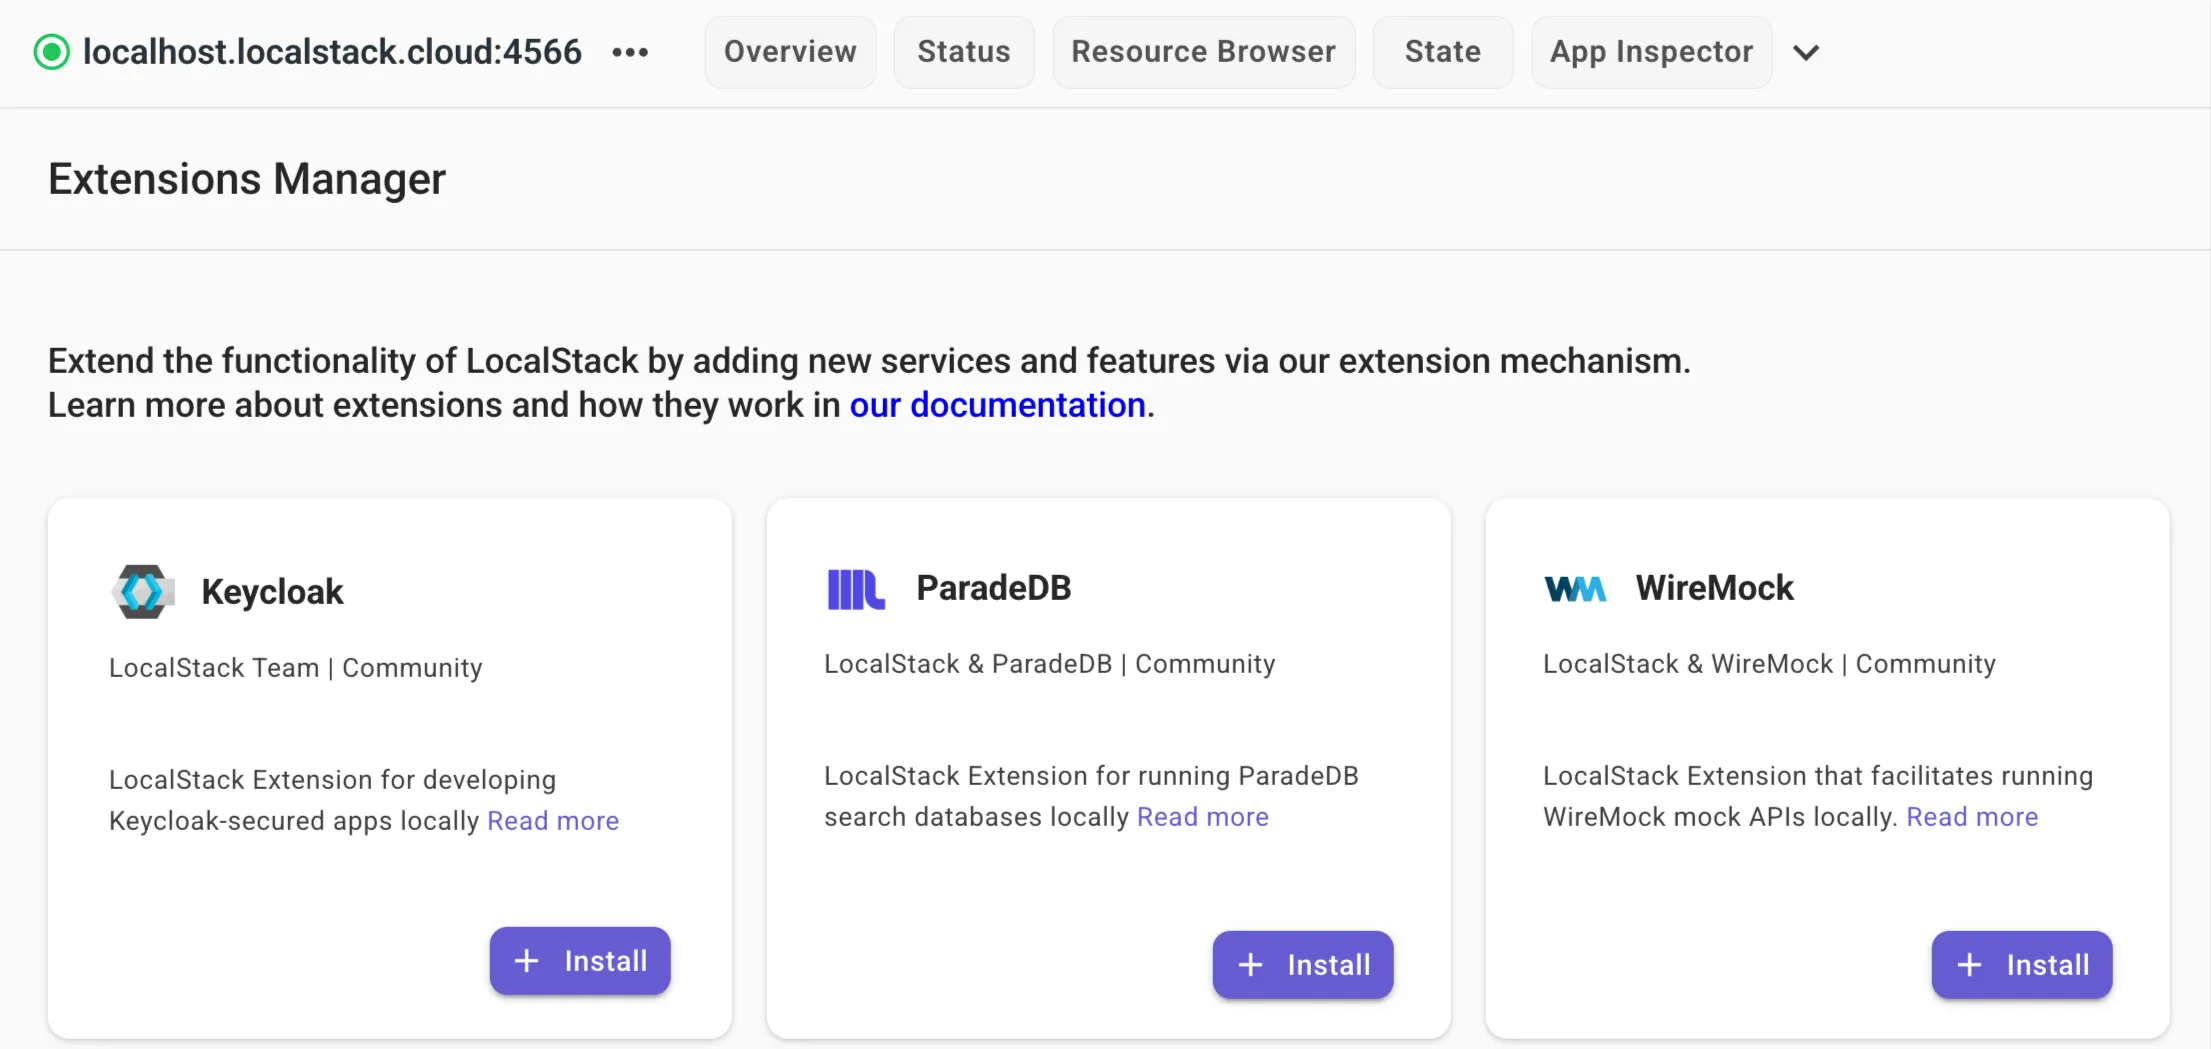
To install the extension, use the LocalStack CLI or the Extensions Library on the LocalStack Web Application.
With LocalStack running, run the following command:
localstack extensions install localstack-keycloakAfter successful installation, you’ll see:
┏━━━━━━━━━━━━━━━━━━━━━━┳━━━━━━━━━━━━━━━━━━━━━━━━━━━━━━━━━━━━━━━━━━━━━━┳━━━━━━━━━┳━━━━━━━━━━━━━━━━━┳━━━━━━━━━━━━━┓┃ Name ┃ Summary ┃ Version ┃ Author ┃ Plugin name ┃┡━━━━━━━━━━━━━━━━━━━━━━╇━━━━━━━━━━━━━━━━━━━━━━━━━━━━━━━━━━━━━━━━━━━━━━╇━━━━━━━━━╇━━━━━━━━━━━━━━━━━╇━━━━━━━━━━━━━┩│ localstack-keycloak │ LocalStack Extension: Keycloak for Identity │ 0.1.0 │ LocalStack Team │ keycloak ││ │ and Access Management │ │ │ │└──────────────────────┴──────────────────────────────────────────────┴─────────┴─────────────────┴─────────────┘Alternatively, navigate to the Extensions Library on the LocalStack Web Application to install it via the UI.
You can also install it directly when starting LocalStack using the EXTENSION_AUTO_INSTALL environment variable:
EXTENSION_AUTO_INSTALL=localstack-keycloak localstack startRestart LocalStack after install. Once started, the extension will:
- Pull and launch Keycloak (v26.0 by default) as a Docker container
- Create a default realm called
localstackwithadminanduserroles - Register a client (
localstack-client/localstack-client-secret) with service account roles - Register Keycloak as an OIDC provider in LocalStack’s IAM
Keycloak is then available at:
- Admin Console:
http://localhost:8080/admin(credentials:admin/admin) - Token Endpoint:
http://keycloak.localhost.localstack.cloud:4566/realms/localstack/protocol/openid-connect/token - Health Check:
http://localhost:9000/health/ready
Step 2: Clone the sample application
We’ve prepared a sample application that uses API Gateway, Lambda, and DynamoDB with Keycloak for JWT-based authentication and role-based access control. Clone the repository and navigate to the sample app:
git clone https://github.com/localstack/localstack-extensions.gitcd localstack-extensions/keycloak/sample-appThe project structure looks like this:
sample-app/├── cdk/│ ├── app.py # CDK entry point│ ├── stacks/│ │ └── api_stack.py # API Gateway + Lambda + DynamoDB│ └── requirements.txt├── lambda/│ ├── authorizer/│ │ └── handler.py # JWT validation│ └── users/│ └── handler.py # User CRUD operations└── README.mdThe application is a user management API with CRUD endpoints (GET /users, POST /users, GET /users/{username}, PUT /users/{username}, DELETE /users/{username}), all protected by a Lambda authorizer that validates Keycloak JWTs.
The setup has two Lambda functions:
- The authorizer extracts the JWT from the
Authorization: Bearer <token>header, fetches Keycloak’s public keys from the JWKS endpoint, and validates the token signature, expiration, and audience. If the token is valid, it returns an IAM policy allowing the request and passes the user’s roles as context to the second Lambda. - The CRUD handler reads the authorization context (username, roles) and enforces role-based access control: any authenticated user can list or read users, but only
adminrole users can create, update, or delete them. Data is stored in DynamoDB.
The CDK stack in cdk/stacks/api_stack.py wires this together. The authorizer Lambda gets environment variables pointing at Keycloak (KEYCLOAK_URL, KEYCLOAK_REALM, EXPECTED_AUDIENCE), and the CRUD Lambda gets the DynamoDB table name.
Step 3: Deploy the CDK stack to LocalStack
Navigate to the CDK directory, install the Python dependencies, and deploy:
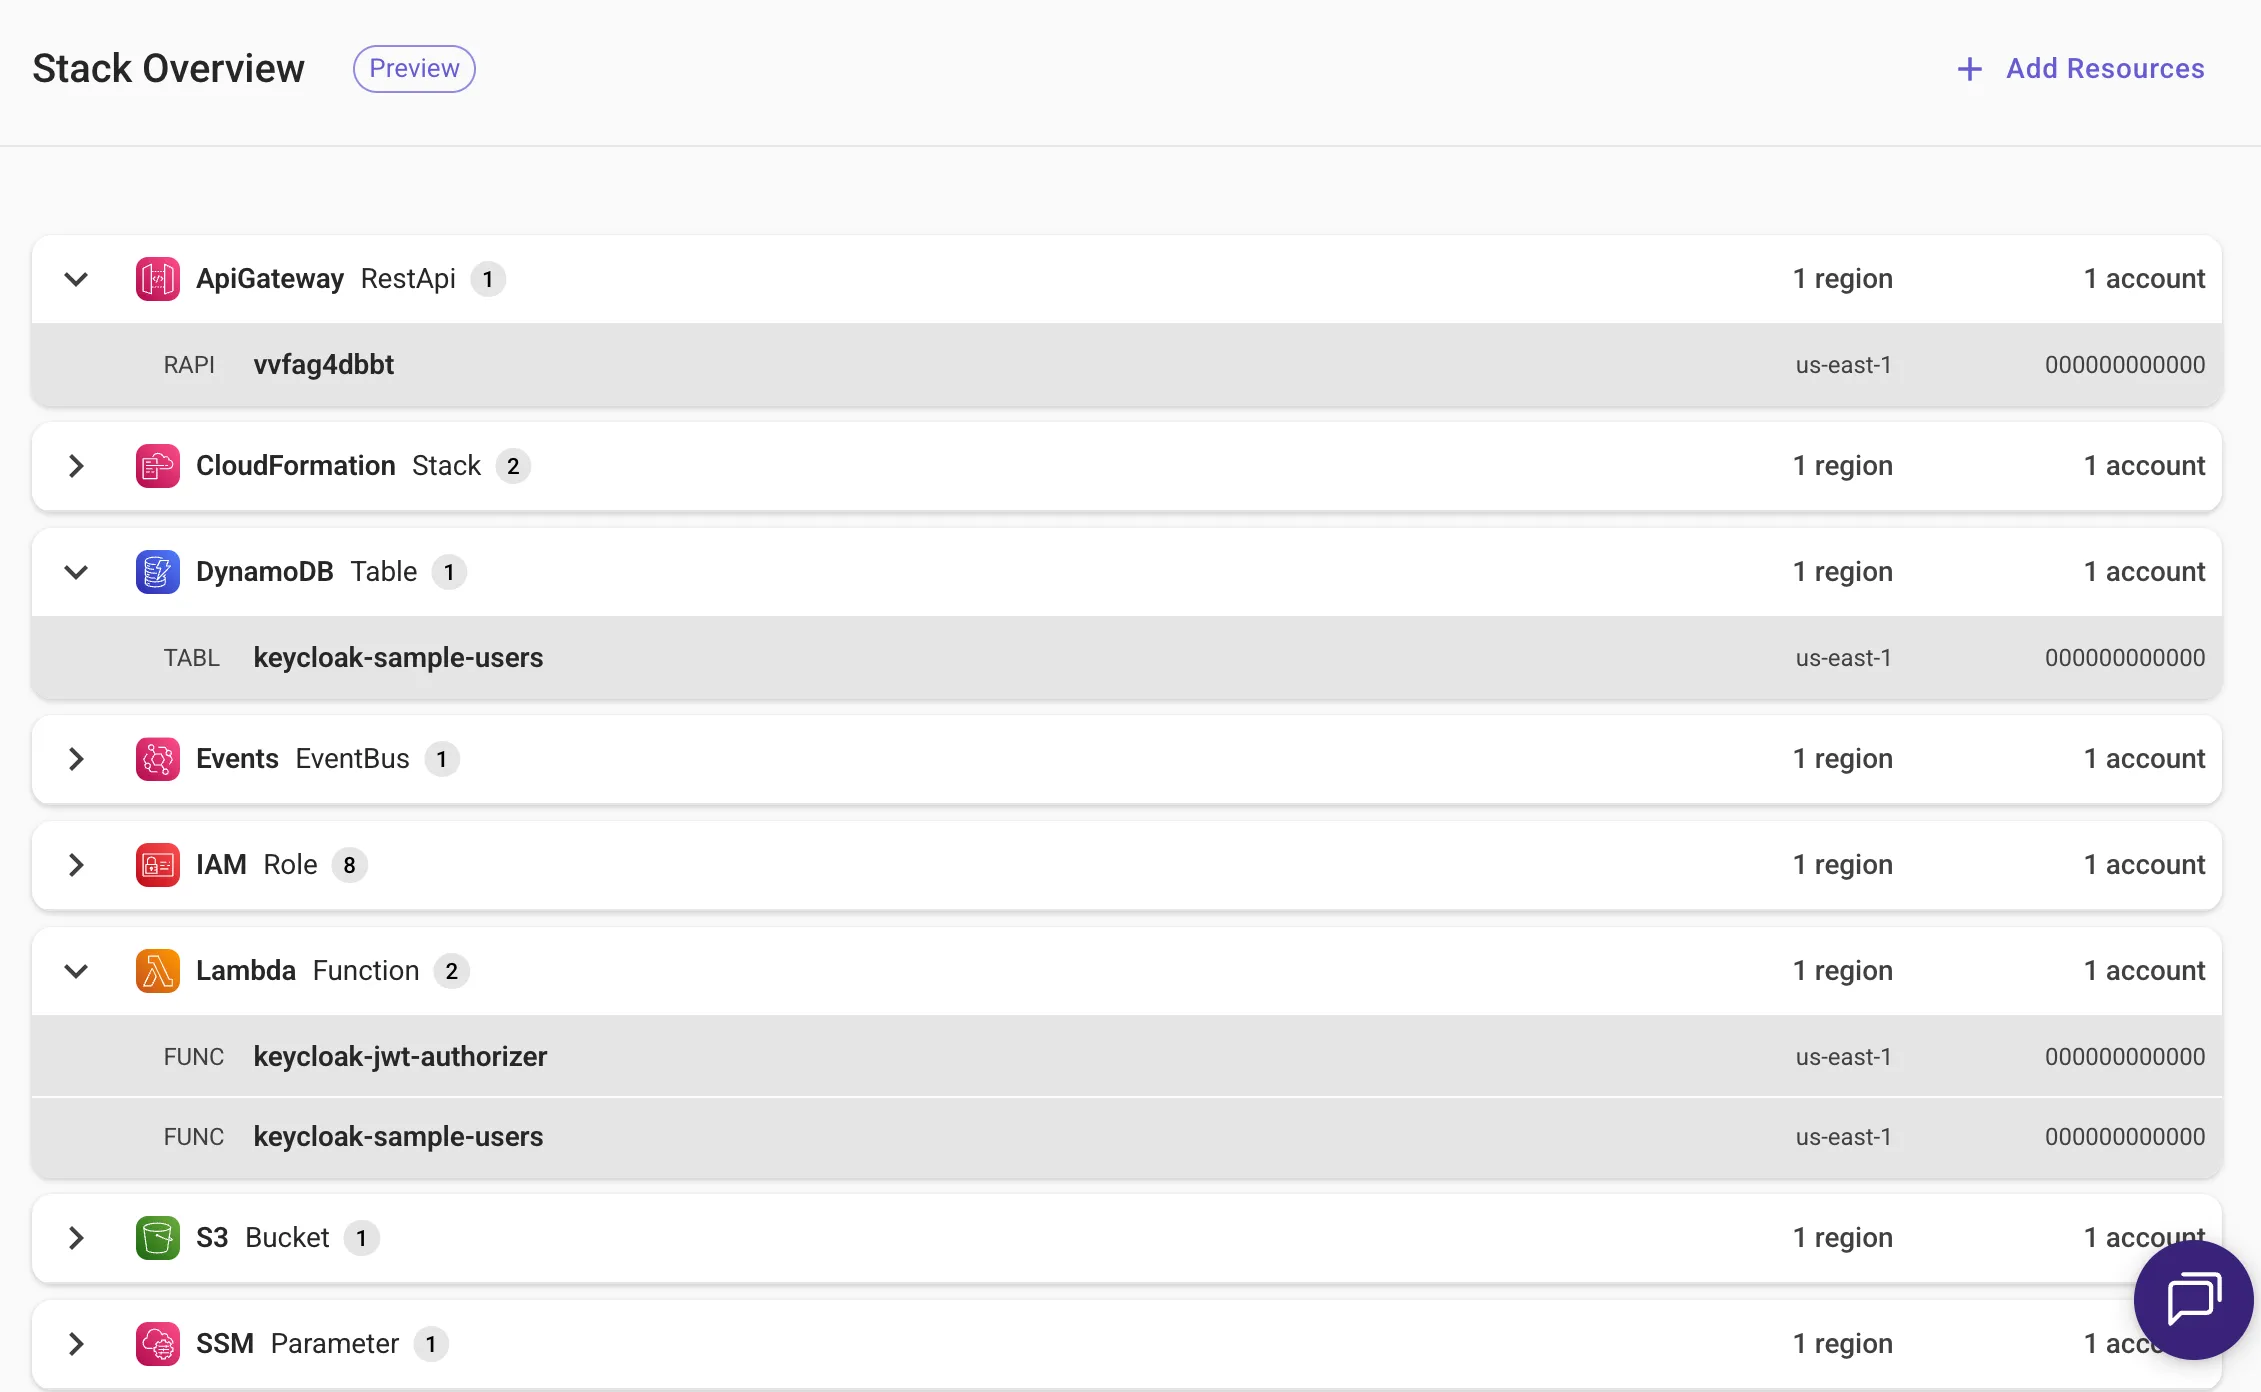
cd cdkpip install -r requirements.txtcdklocal bootstrapcdklocal deploy --all --require-approval neverAfter deployment, you’ll see output like:
 ✅  KeycloakSampleApiStack
Outputs:KeycloakSampleApiStack.KeycloakSampleApiEndpointF8636831 = https://<api-id>.execute-api.localhost.localstack.cloud:4566/prod/Stack ARN:arn:aws:cloudformation:us-east-1:000000000000:stack/KeycloakSampleApiStack/...
The stack creates a DynamoDB table (keycloak-sample-users), two Lambda functions (the JWT authorizer and the CRUD handler), and an API Gateway REST API with routes for user management.
Step 4: Get a token and test the API
Now let’s test the API by getting a token and testing the endpoints. We’ll use the curl command to test the endpoints.
4.1: Get an access token from Keycloak
Request a JWT from Keycloak using the client credentials grant:
TOKEN=$(curl -s -X POST \ "http://keycloak.localhost.localstack.cloud:4566/realms/localstack/protocol/openid-connect/token" \ -d "grant_type=client_credentials" \ -d "client_id=localstack-client" \ -d "client_secret=localstack-client-secret" | jq -r '.access_token')You can inspect the token’s contents to see what roles and claims it carries:
PAYLOAD=$(echo $TOKEN | cut -d'.' -f2)python3 -c "import sys,json,base64; p=sys.argv[1]; print(json.dumps(json.loads(base64.urlsafe_b64decode(p+'='*(4-len(p)%4))), indent=2))" "$PAYLOAD"The output includes the realm_access.roles field with both admin and user roles (the default service account has the admin role):
{ "realm_access": { "roles": [ "offline_access", "admin", "default-roles-localstack", "uma_authorization", "user" ] }, "azp": "localstack-client", "...": "..."}4.2: Set up the API URL
Grab the API Gateway ID and construct the base URL:
API_ID=$(awslocal apigateway get-rest-apis --query 'items[0].id' --output text)API_URL="http://localhost:4566/_aws/execute-api/${API_ID}/prod"4.3: Test the CRUD endpoints
Start by listing users (the table is empty at first):
curl -s -H "Authorization: Bearer $TOKEN" "${API_URL}/users" | jq .{ "users": [], "count": 0}Create a user (requires the admin role):
curl -s -X POST "${API_URL}/users" \ -H "Authorization: Bearer $TOKEN" \ -H "Content-Type: application/json" \ -d '{"username": "john", "email": "john@example.com", "name": "John Doe"}' | jq .{ "username": "john", "email": "john@example.com", "name": "John Doe", "created_at": "2026-04-14T09:58:14.841752", "created_by": "service-account-localstack-client"}The created_by field is set to service-account-localstack-client, the identity extracted from the JWT by the authorizer and passed to the CRUD Lambda through API Gateway context.
Retrieve, update, and delete the user:
# Get usercurl -s -H "Authorization: Bearer $TOKEN" "${API_URL}/users/john" | jq .
# Update user (admin role required)curl -s -X PUT "${API_URL}/users/john" \  -H "Authorization: Bearer $TOKEN" \  -H "Content-Type: application/json" \  -d '{"email": "john.doe@example.com"}' | jq .
# Delete user (admin role required)curl -s -X DELETE -H "Authorization: Bearer $TOKEN" "${API_URL}/users/john" | jq .
After deletion, a GET on the same user returns a 404:
{ "error": "User 'john' not found"}4.4: What happens without a token
Without a token, the authorizer returns a Deny policy and API Gateway blocks the request:
curl -s "${API_URL}/users" | jq .{ "message": "Unauthorized"}Step 5: Explore the Keycloak Admin Console
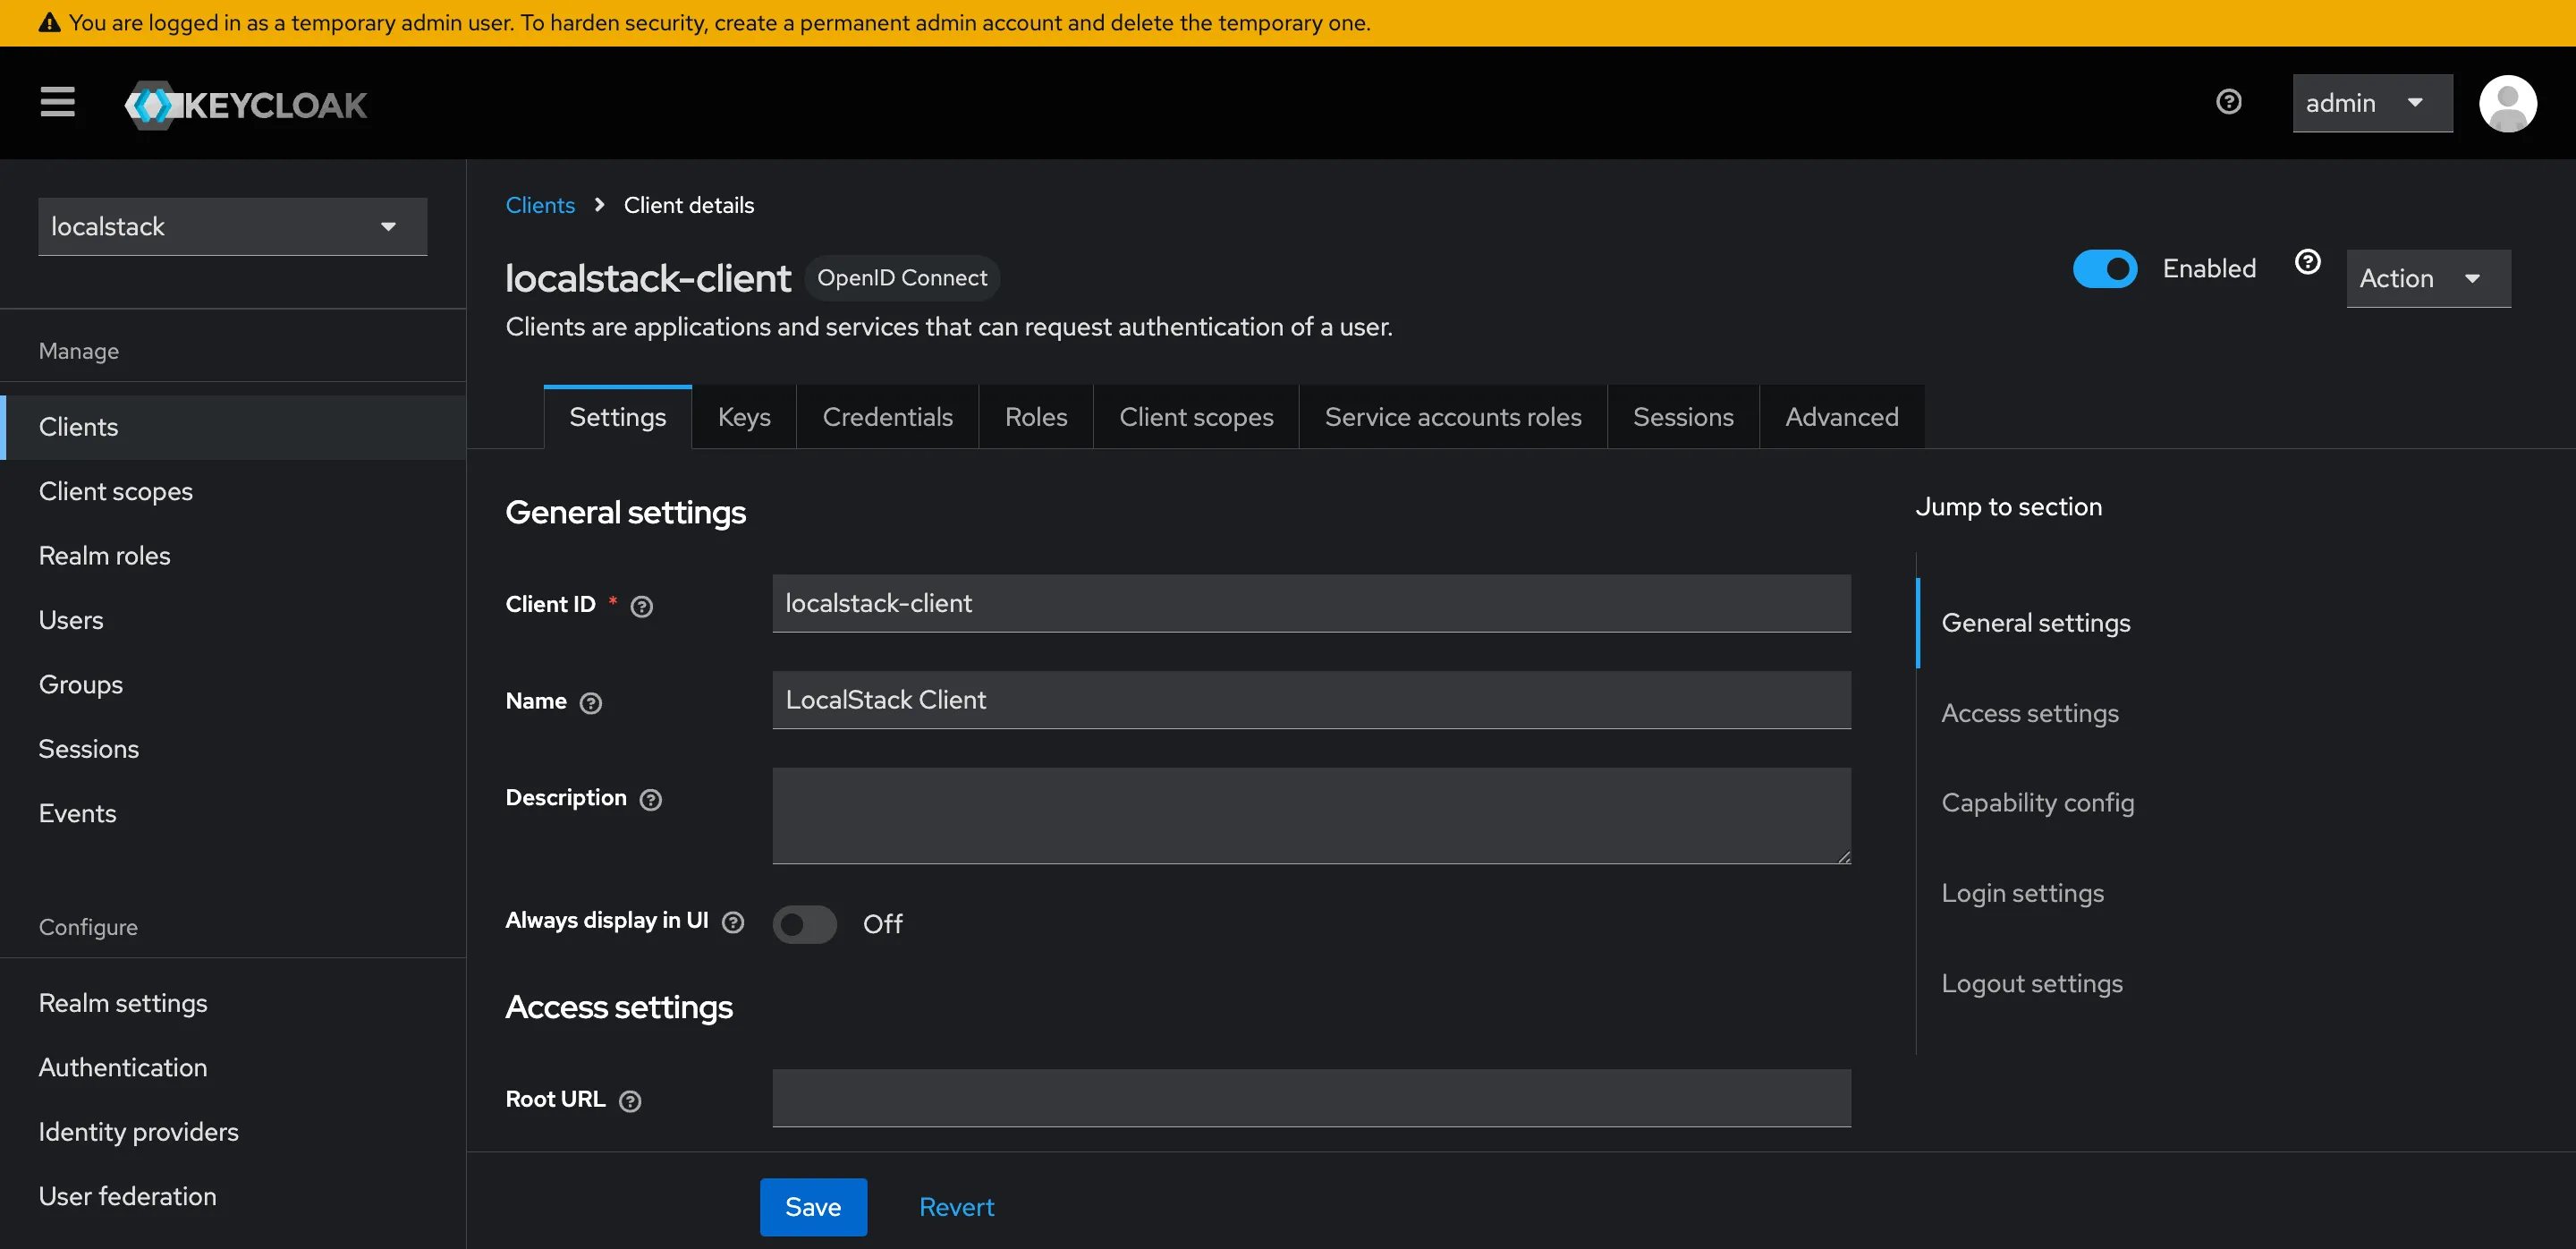
The extension exposes the Keycloak Admin Console at http://localhost:8080/admin. Log in with admin / admin to browse the setup.
From the console, you can:
- View the
localstackrealm and its settings - See the
adminanduserrealm roles under Realm roles - Browse the
localstack-clientconfiguration under Clients, including its service account roles - Create additional users, assign roles, and test different access patterns
Conclusion
In this tutorial, we deployed a user management API with API Gateway, Lambda, and DynamoDB, then walked through the full OAuth2 flow: token issuance from Keycloak, JWT validation in a Lambda authorizer, and role-based access control in the CRUD handler.
Any application that uses JWTs for authorization, whether through API Gateway authorizers, AssumeRoleWithWebIdentity, or direct token validation in your code, can use this extension to test those flows locally. You get a real Keycloak instance with real tokens and real signature validation, not mocked auth that diverges from production behaviour.
Learn More
- Keycloak Documentation: Official docs covering realms, clients, roles, and admin API
- Keycloak GitHub: Source code and community contributions
- LocalStack Documentation: Getting started guides, service coverage, and configuration options
- LocalStack Extensions: How extensions work and how to build your own
- Extensions Library: Browse available community extensions
- LocalStack Keycloak Extension on PyPI: Package page with version history and configuration reference
- LocalStack Slack Community: Join the community for questions and discussions