How to automatically load state in LocalStack
LocalStack provides several methods to automate resource creation, enhance developer workflows, and simplify setup processes. This tutorial demonstrates how to use these methods to avoid manual setups and streamline the development and testing of your cloud applications.

LocalStack offers a cloud emulator with a complete local cloud stack for developing and testing cloud applications. It functions like a local “mini-cloud” operating system where various components operate within a Docker container and provide a host and several external network ports. This setup lets integrations, SDKs, or CLI tools connect to LocalStack APIs by overriding the AWS service-specific endpoints.
LocalStack acts as a local server, receiving AWS API requests from various integrations to provision resources. You create AWS resources locally using an integration (like the AWS CLI or Terraform) which sends these requests to LocalStack and provisions the resources. However, there are scenarios where you’ll want to automatically load or pre-seed state in LocalStack, bypassing the manual setup and deployment of resources. This is crucial in development and testing workflows, where you need to set up test fixtures or additional resources to bootstrap your testing environment before executing tests.
In this blog, we’ll explore three methods to load state automatically into your LocalStack container. We’ll provide example scenarios to demonstrate how these mechanisms function and discuss the scenarios in which they are useful, including any limitations.
Example Scenario: Using an SQS queue to invoke a Lambda function
To start, we’ll go through a simple scenario of creating and configuring an SQS queue to trigger a Lambda function.
First, we’ll use the AWS CLI and the awslocal wrapper script to create this infrastructure. Anything within a LocalStack container is considered a “state,” including the resources themselves as well as any data they might contain. These can be freshly created or saved and loaded into the LocalStack container.
Assuming your LocalStack container is already running, you can create a simple Lambda function (func) as follows:
echo 'def handler(event, context):' > /tmp/testlambda.pyecho '  print("Debug output from Lambda function, event:", event)' >> /tmp/testlambda.py(cd /tmp; zip testlambda.zip testlambda.py)
awslocal lambda create-function \  --function-name func1 \  --runtime python3.8 \  --role arn:aws:iam::000000000000:role/lambda-role \  --handler testlambda.handler \  --timeout 30 \  --zip-file fileb:///tmp/testlambda.zip
Next, create an SQS queue (myqueue) and set up an event source mapping between SQS and Lambda:
awslocal sqs create-queue --queue-name myqueueawslocal lambda create-event-source-mapping \ --function-name func1 \ --batch-size 10 \ --event-source-arn arn:aws:sqs:us-east-1:000000000000:myqueueTo test the SQS trigger, send a message that will invoke the Lambda function:
awslocal sqs send-message \ --queue-url http://localhost:4566/000000000000/myqueue \ --message-body "Hello from SQS"To check the Lambda function logs, use LocalStack logs (localstack logs) or access CloudWatch Logs by retrieving the latest log stream name and directly obtaining the log events:
awslocal logs get-log-events \ --log-group-name /aws/lambda/func1 \ --log-stream-name $(awslocal logs describe-log-streams \ --log-group-name /aws/lambda/func1 \ --query 'logStreams[0].logStreamName' \ --output text)Next, we’ll look at how to automatically load these resources every time you start your LocalStack container.
Initialization Hooks
Initialization Hooks are a feature where you can mount scripts or directories to specific lifecycle phases in LocalStack, which are then executed automatically. This ensures that your LocalStack container starts with predefined resources, using shell, Python, or Terraform (with a special extension) scripts.
Init Hooks can be used for various purposes, including:
- Automatically provisioning local resources upon startup.
- Adding custom TLS certificates to LocalStack.
- Setting up external development & debugging tools.
- Populating local resources with test data.
Key Concepts
LocalStack has four key lifecycle phases:
BOOT: The container is running but the LocalStack runtime hasn’t started yet.START: The LocalStack runtime is starting up.READY: The LocalStack runtime is fully operational and ready to handle requests.SHUTDOWN: The LocalStack runtime and container are in the process of shutting down.
These phases correspond to directories within the LocalStack container: boot.d, start.d, ready.d, and shutdown.d located in /etc/localstack/init.
By mounting your scripts or directories to these stages, LocalStack will execute them accordingly. Now, let’s adapt our example to automatically create resources when the LocalStack runtime reaches the READY phase.
Running the example
Before starting, create a new file named init-aws.sh and include the AWS CLI (awslocal) commands to set up the resources. Below are the commands to add to the file to ensure they execute when the LocalStack runtime is ready.
#!/bin/bash
echo 'def handler(event, context):' > /tmp/testlambda.pyecho '  print("Debug output from Lambda function, event:", event)' >> /tmp/testlambda.py(cd /tmp; zip testlambda.zip testlambda.py)
awslocal lambda create-function \  --function-name func1 \  --runtime python3.8 \  --role arn:aws:iam::000000000000:role/lambda-role \  --handler testlambda.handler \  --timeout 30 \  --zip-file fileb:///tmp/testlambda.zip
awslocal sqs create-queue --queue-name myqueueawslocal lambda create-event-source-mapping \  --function-name func1 \  --batch-size 10 \  --event-source-arn arn:aws:sqs:us-east-1:000000000000:myqueue
After creating the file, ensure it is executable with the following command:
chmod +x init-aws.shIf the script is not executable, the LocalStack process won’t be able to run it.
To deploy the example, you can use either the localstack CLI or a Docker Compose configuration. Let’s explore these options!
localstack CLI
To mount the shell script into the LocalStack container using the localstack CLI, utilize the DOCKER_FLAGS configuration variable. This variable lets you append custom flags during the startup of the LocalStack container.
If you are executing the command in the same directory as init-aws.sh, use the following command:
DOCKER_FLAGS='-v ./init-aws.sh:/etc/localstack/init/ready.d/init-aws.sh' \localstack startThis command mounts the init-aws.sh script into the /etc/localstack/init/ready.d/ directory of the LocalStack container.
Now, you can access the LocalStack logs to observe the resources being created in the LocalStack container:
LocalStack version: 3.7.3.dev68LocalStack build date: 2024-10-01LocalStack build git hash: 9e222ede5
  adding: testlambda.py (deflated 9%)2024-10-10T14:21:18.948  INFO --- [et.reactor-0] localstack.request.aws     : AWS lambda.CreateFunction => 201{    "FunctionName": "func1",    "FunctionArn": "arn:aws:lambda:us-east-1:000000000000:function:func1",    ...    "State": "Pending",    "StateReason": "The function is being created.",    "StateReasonCode": "Creating",    "PackageType": "Zip",    ...}2024-10-10T14:21:19.301  INFO --- [et.reactor-1] localstack.request.aws     : AWS sqs.CreateQueue => 200{    "QueueUrl": "http://sqs.us-east-1.localhost.localstack.cloud:4566/000000000000/myqueue"}2024-10-10T14:21:19.563  INFO --- [et.reactor-0] localstack.request.aws     : AWS lambda.CreateEventSourceMapping => 202{    "UUID": "80178987-ccab-4831-a03d-231b66e72a0a",    ...    "FunctionArn": "arn:aws:lambda:us-east-1:000000000000:function:func1",    "LastModified": 1728570079.559371,    "State": "Creating",    ...}Ready.
After setting up the resources, you can send a message to the SQS queue and check the CloudWatch logs to review the Lambda function invocation logs.
Docker Compose
To implement the previous example using Docker Compose, add a volume mount for your script in the ready.d directory. Here’s a minimal Docker Compose configuration:
version: "3.8"
services:  localstack:    container_name: "${LOCALSTACK_DOCKER_NAME:-localstack-main}"    image: localstack/localstack    ports:      - "127.0.0.1:4566:4566"      - "127.0.0.1:4510-4559:4510-4559"    volumes:      - "./init-aws.sh:/etc/localstack/init/ready.d/init-aws.sh"  # ready hook      - "${LOCALSTACK_VOLUME_DIR:-./volume}:/var/lib/localstack"      - "/var/run/docker.sock:/var/run/docker.sock"
Start the LocalStack container with the following command and monitor the logs as previously described:
docker compose upLocalStack also offers internal endpoints to check the state of the initialization process. Use this command to see the status of the shell script you mounted:
curl -s localhost:4566/_localstack/init | jq .Here is an example output:
{ "completed": { "BOOT": true, "START": true, "READY": true, "SHUTDOWN": false }, "scripts": [ { "stage": "READY", "name": "init-aws.sh", "state": "SUCCESSFUL" } ]}To query individual stages, you can use the following command:
curl -s localhost:4566/_localstack/init/ready | jq .Limitations
While Init Hooks are versatile, they have certain limitations when it comes to loading state:
- Init Hooks do not provide a faster method for provisioning resources. The time taken is similar to the traditional manual deployment which may not be ideal in certain situations.
- Init Hooks support only shell, Python, or Terraform scripts. Using other Infrastructure-as-Code frameworks (like CDK or Pulumi) requires installing additional dependencies within the LocalStack container, which can increase startup time.
- Resources created by Init Hooks are ephemeral and are removed when the LocalStack container shuts down. This can slow the dev&test cycle as resources need to be provisioned anew with each start.
Export & Import State
The Export & Import State feature in LocalStack provides a convenient way to take a snapshot of the entire LocalStack state at a given point in time and save it as a state file. This state file is stored on the local disk and can later be used to restore the exact state into a new LocalStack container.
This feature is particularly useful for scenarios such as:
- Preserving the state of the environment between LocalStack sessions.
- Sharing a working development & testing setup with others.
- Creating reproducible environments for testing and debugging.
Key Concepts
The Export & Import State feature in LocalStack allows you to bundle all resources from your current LocalStack container into a single state file on your machine. This involves two key operations:
export: This command instructs LocalStack to create and save the state file to your machine.import: This command directs LocalStack to load the state file, injecting it into the LocalStack runtime to make the resources available.
Unlike Init Hooks, which provisions resources during the startup process, the Export & Import State feature captures the entire state from a previous container run and restores it in a fresh container, thus avoiding the need to provision everything from scratch.
Let’s explore how to export the state and then import it using the localstack CLI.
Running the example
To run this example, ensure your LocalStack Pro container is active with a valid Auth Token. You can follow the steps outlined earlier in the example scenario to create the Lambda function, SQS queue, and add the event source mapping to enable SQS message triggers for Lambda.
Export the state file
To export the state, use the localstack CLI’s export command as follows:
localstack state export lambda-sqs-trigger-stateThe output should look like this:
Retrieving state from the container ━━━━━━━━━━━━━━━━━━━━━━━━━━━━━━━━━━━━━━━━ 100% 0:00:00LocalStack state successfully exported to: /Users/harshcasper/load-state-localstack/lambda-sqs-trigger-state ✅This command saves the state file as lambda-sqs-trigger-state on your local machine. You can customize the save location by specifying a file path.
To export specific services, use the --services flag followed by comma-separated service names. By default, the state of all services is exported.
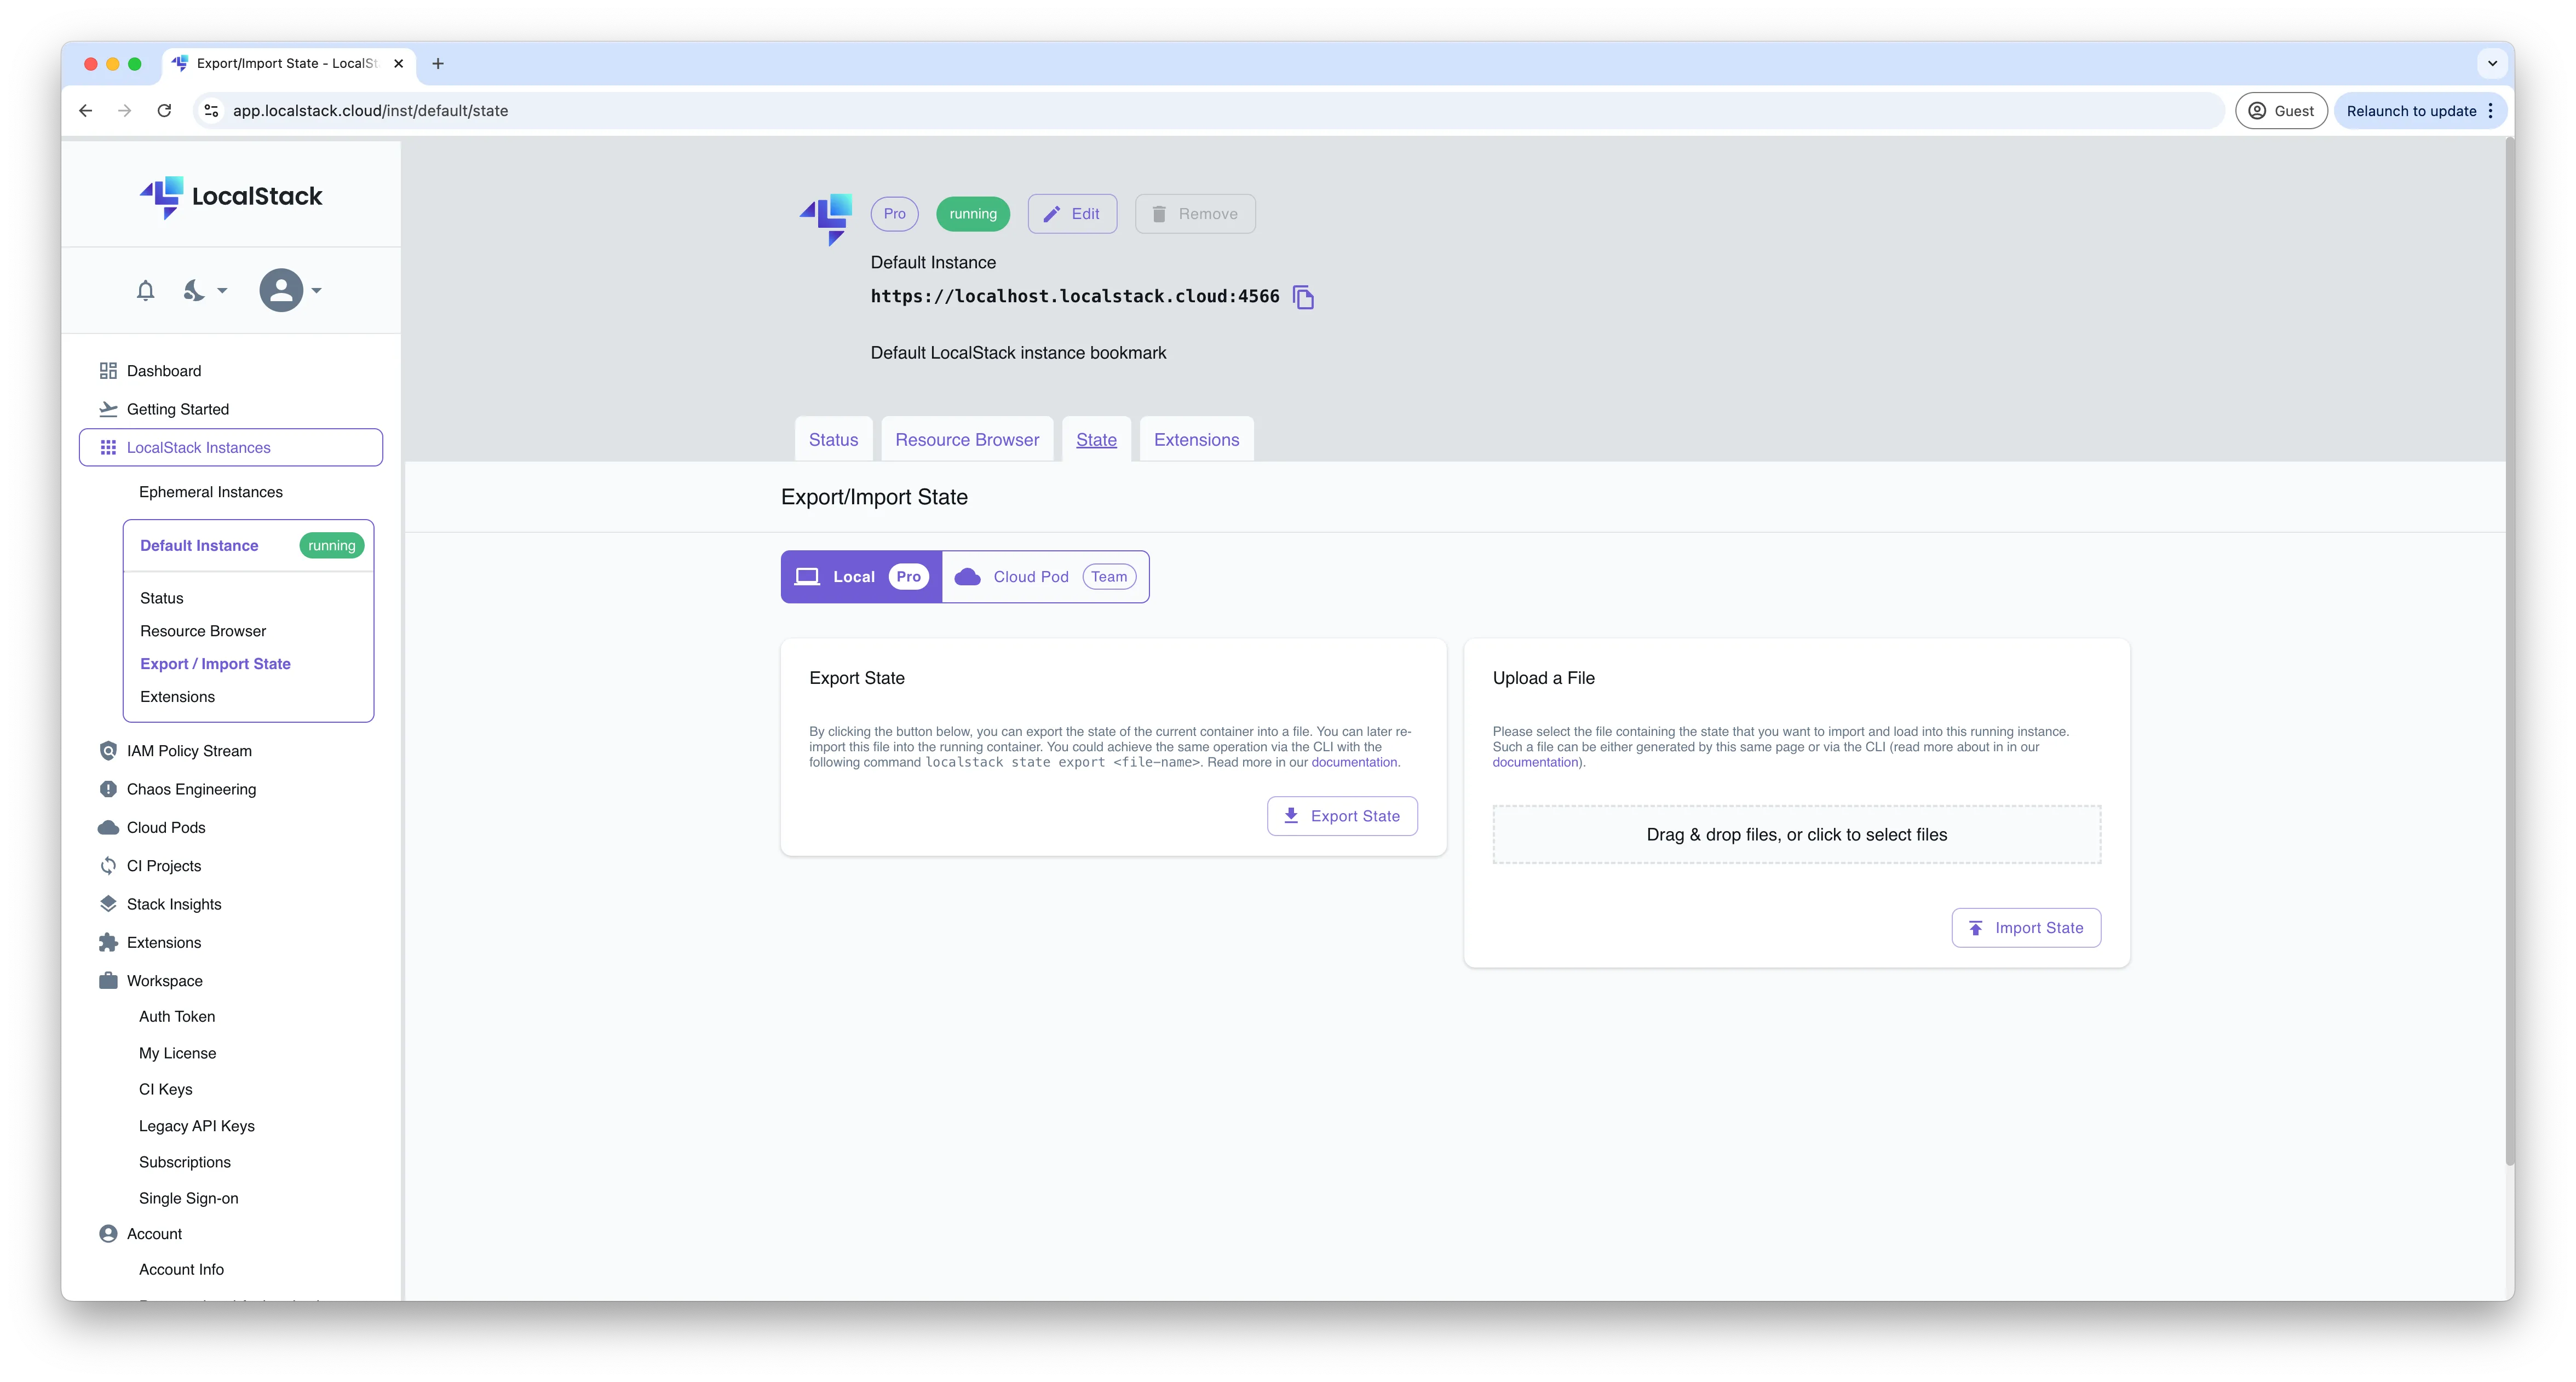
Alternatively, you can use the LocalStack web application to export state by navigating to the Export/Import State tab and clicking on Export State.
Import the state file
Before importing the state, restart the LocalStack container to reset to a fresh state:
localstack restartThen, use the localstack CLI’s import command to import your previously exported state file:
localstack state import lambda-sqs-trigger-stateThe output should look like this:
Loading state ━━━━━━━━━━━━━━━━━━━━━━━━━━━━━━━━━━━━━━━━ 100% 0:00:00LocalStack state successfully imported from /Users/harshcasper/load-state-localstack/lambda-sqs-trigger-state ✅The import process injects the state into your running LocalStack container. If you have pre-existing resources like Lambda functions or SQS queues, the state import will overwrite them. If your state file is stored in a different location, be sure to specify the filepath.
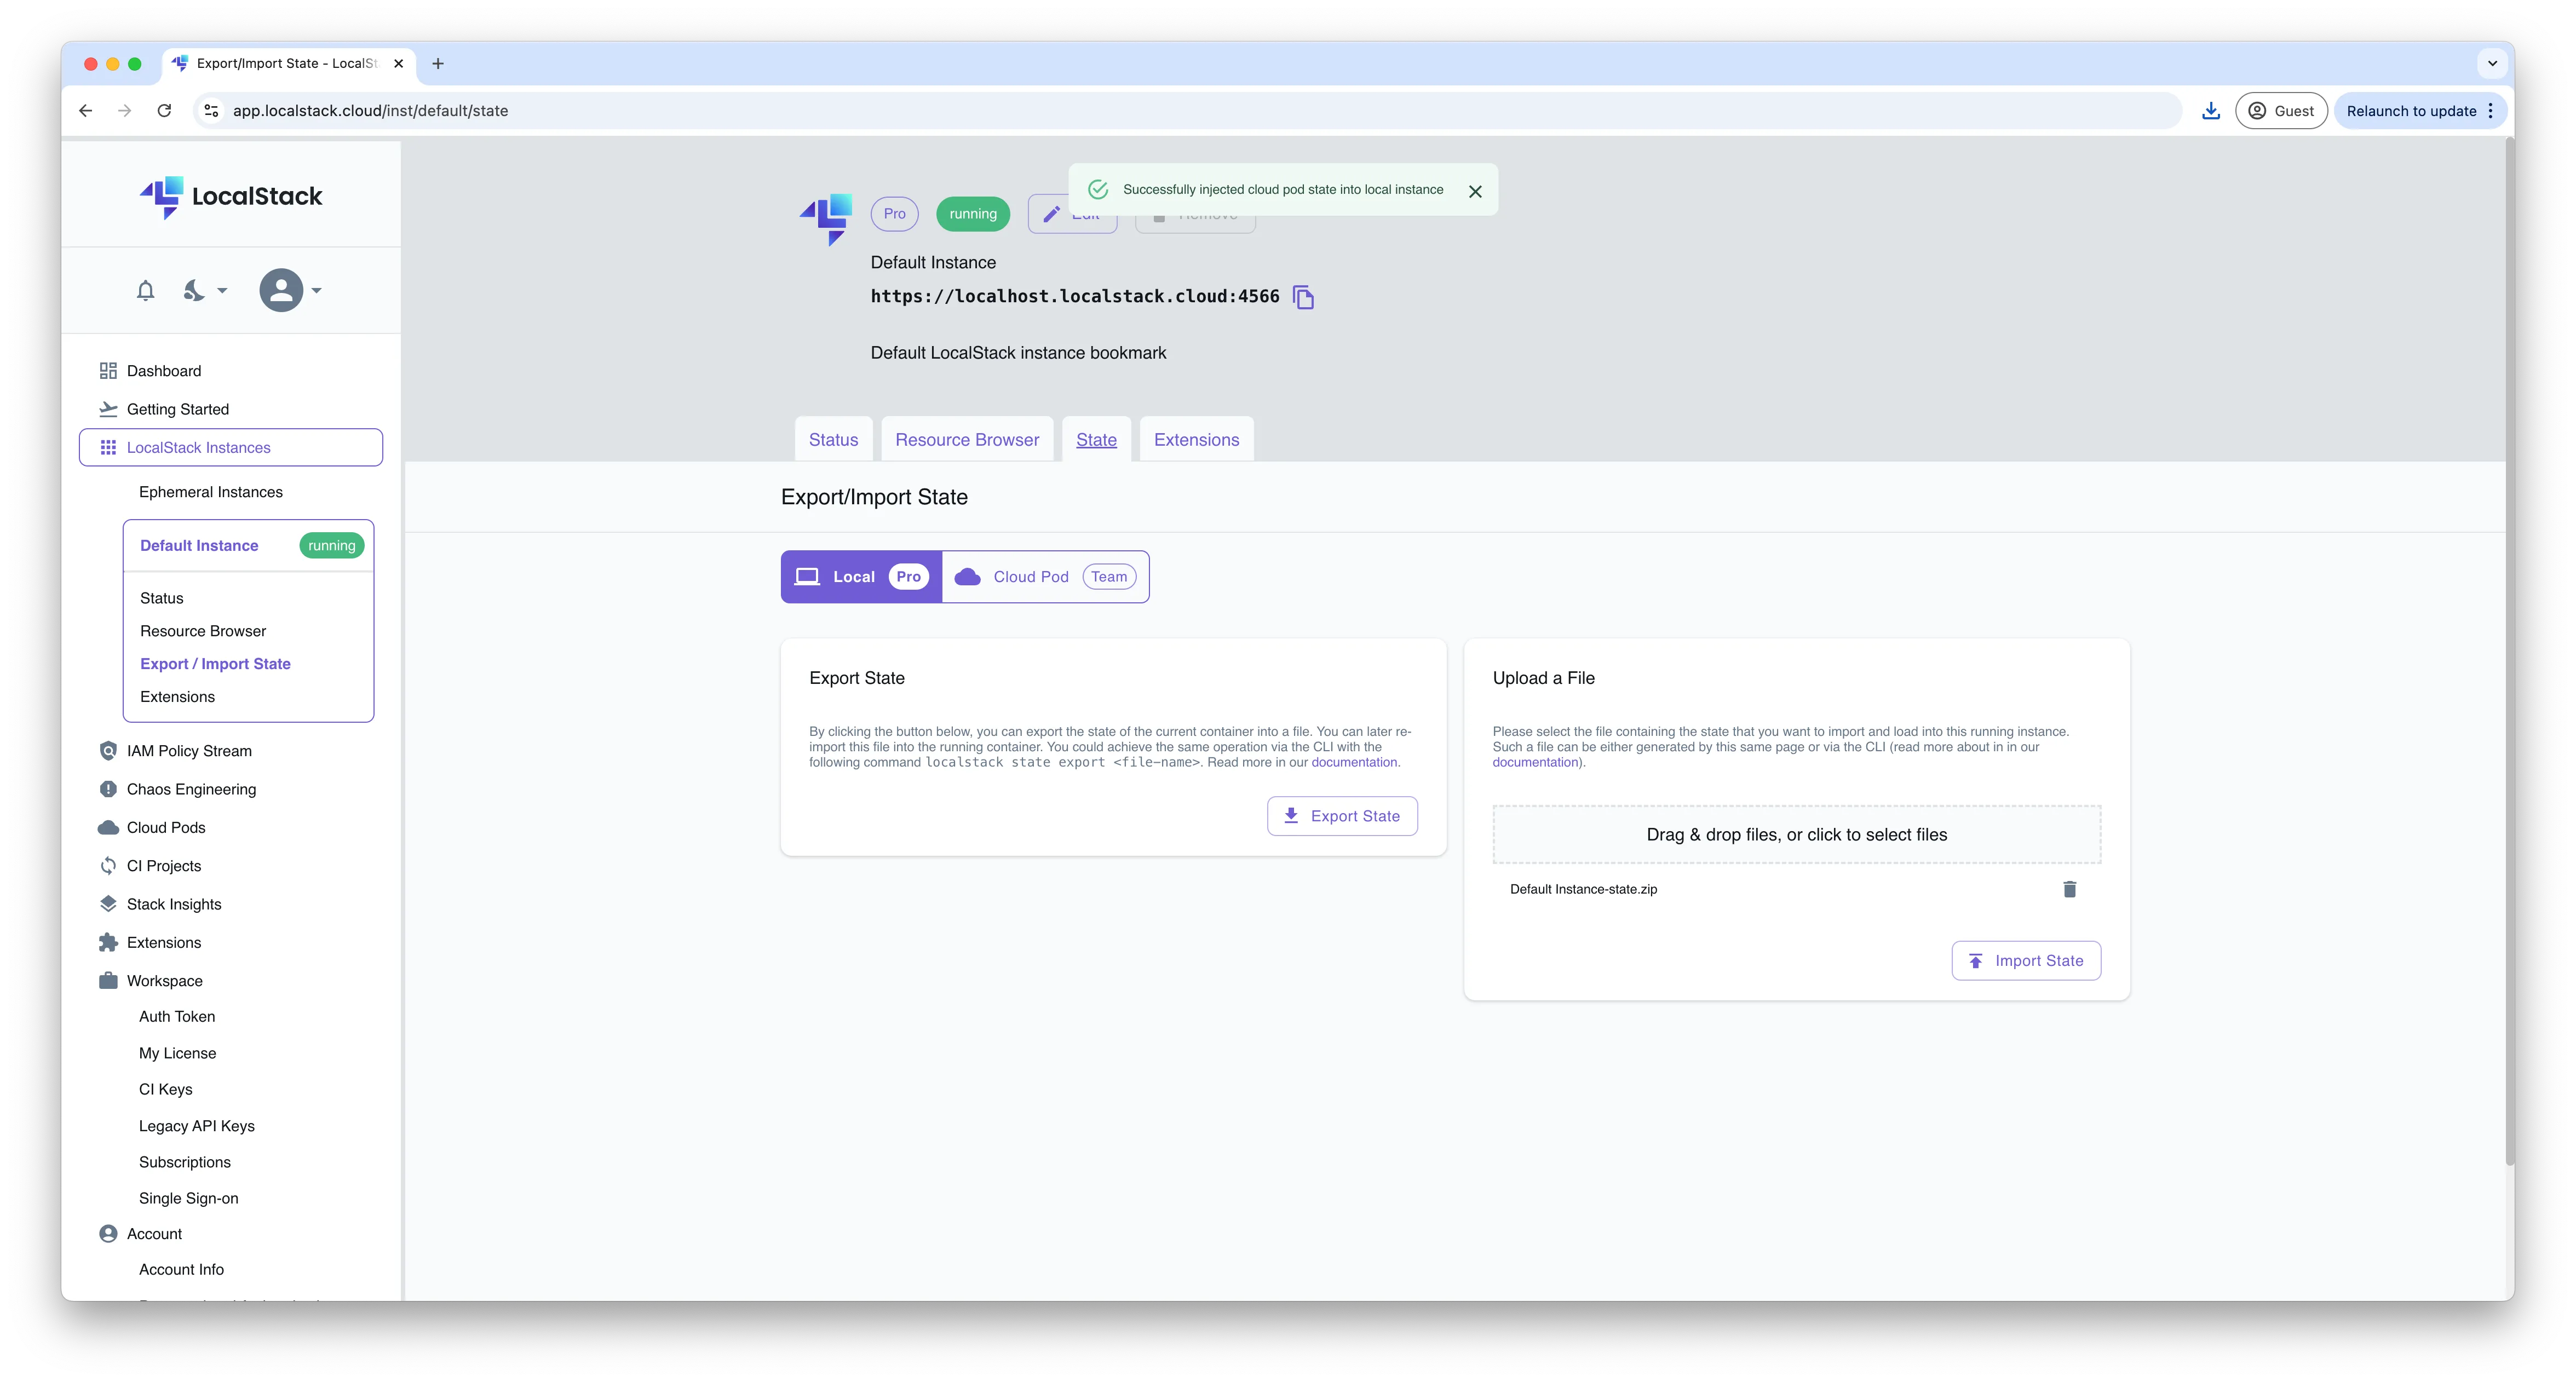
You can also import the state using the LocalStack web application. Simply navigate to the Export/Import State tab, upload your previously created file, and click on Import State.
Automatically importing the state files
You can mount your state file to automatically inject your state every time you start a fresh LocalStack container. Within the container, LocalStack searches the /etc/localstack/init-pod.d directory for state files to automatically load Cloud Pods during startup.
Create a new directory named init-pods.d and add your state file into that directory. Set up a new Docker Compose configuration (docker-compose.yml) with these details:
version: "3.8"
services:  localstack:    container_name: "${LOCALSTACK_DOCKER_NAME:-localstack-main}"    image: localstack/localstack-pro    ports:      - "127.0.0.1:4566:4566"      - "127.0.0.1:4510-4559:4510-4559"    environment:      # Activate LocalStack Pro: https://docs.localstack.cloud/getting-started/auth-token/      - LOCALSTACK_AUTH_TOKEN=${LOCALSTACK_AUTH_TOKEN:?}  # required for Pro    volumes:      - "./init-pods.d:/etc/localstack/init-pods.d"      - "${LOCALSTACK_VOLUME_DIR:-./volume}:/var/lib/localstack"      - "/var/run/docker.sock:/var/run/docker.sock"
Launch your Docker Compose and monitor the localstack container logs to confirm that the resources have been successfully injected:
docker compose up
....localstack-main  | Loading state ━━━━━━━━━━━━━━━━━━━━━━━━━━━━━━━━━━━━━━━━ 100% 0:00:00localstack-main  | LocalStack state successfully imported fromlocalstack-main  | /etc/localstack/init/ready.d/lambda-sqs-trigger-state ✅localstack-main  | Ready....
Limitations
The Export & Import State feature is useful, but it has certain limitations when it comes to managing state:
- State files may not restore correctly if there is a version mismatch between the LocalStack used to create the state and the target version. Users receive a confirmation message during version mismatches, but this often results in a corrupted state, preventing some or all resources from loading.
- Not all services emulated by LocalStack support this feature. As documented, some services may not save or restore correctly, leading to missing resources when loading the state and potentially breaking your test suite.
- State files can be saved locally, on version-control systems, or object storage, but there is no standardized method for sharing and collaborating on these files. Moreover, versions of state files are not maintained, thus making it difficult to track changes over time.
Cloud Pods
Cloud Pods are persistent state snapshots of your LocalStack container. While similar to the State Export & Import feature, Cloud Pods store state files on the LocalStack Web Application or a supported storage solution, which can be managed via the localstack CLI. This streamlines the process of saving and loading infrastructure states for team collaboration. Cloud Pods are versioned and easy to build upon, making them suitable for both local development and continuous integration or ephemeral environments.
Cloud Pods can be used for various purposes, including:
- Sharing LocalStack state snapshots within a team for collaborative debugging.
- Pre-seeding cloud resources and test data in automated LocalStack setups for CI processes.
- Developing templates to reduce duplication and streamline app development among team members.
Key Concepts
Cloud Pods can be managed using the pods subcommand which is shipped alongside the localstack CLI. It offers two main operations:
save: This commands the Cloud Pod API to save your infrastructure state and store it on a designated storage backend.load: This commands the Cloud Pod API to retrieve and apply your infrastructure state from the storage backend.
Cloud Pods provide additional capabilities beyond the State Export & Import feature, including:
- End-to-end encryption of Cloud Pods, allowing the use of passphrases or PGP keys for securely loading your state at rest.
- The ability to choose a specific strategy for merging Cloud Pod states into your existing LocalStack container when resources are already present.
- The extraction of a metamodel from the Cloud Pod, which creates a human-readable representation of the contents that can be displayed through the CLI or a Web Application.
Cloud Pods enhance predefined infrastructure components, extending the concept of Infrastructure as Code (IaC) to Infrastructure as State (IaS), as provided by Cloud Pods.
Running the example
To start, make sure your LocalStack Pro container is running with a valid Auth Token. Follow the steps in the example scenario to set up the Lambda function, SQS queue, and configure an event source mapping that allows SQS messages to trigger the Lambda.
Save the infrastructure state
To save the state, use the localstack CLI’s pod save command:
localstack pod save lambda-sqs-trigger-podThe output should look like this:
Cloud Pod `lambda-sqs-trigger-pod` successfully created ✅Version: 1Remote: platformServices: lambda,sts,s3,sqs,cloudwatchThis command saves the Cloud Pod as lambda-sqs-trigger-pod on the LocalStack storage backend and makes it visible on the LocalStack Web Application under the Cloud Pods page.
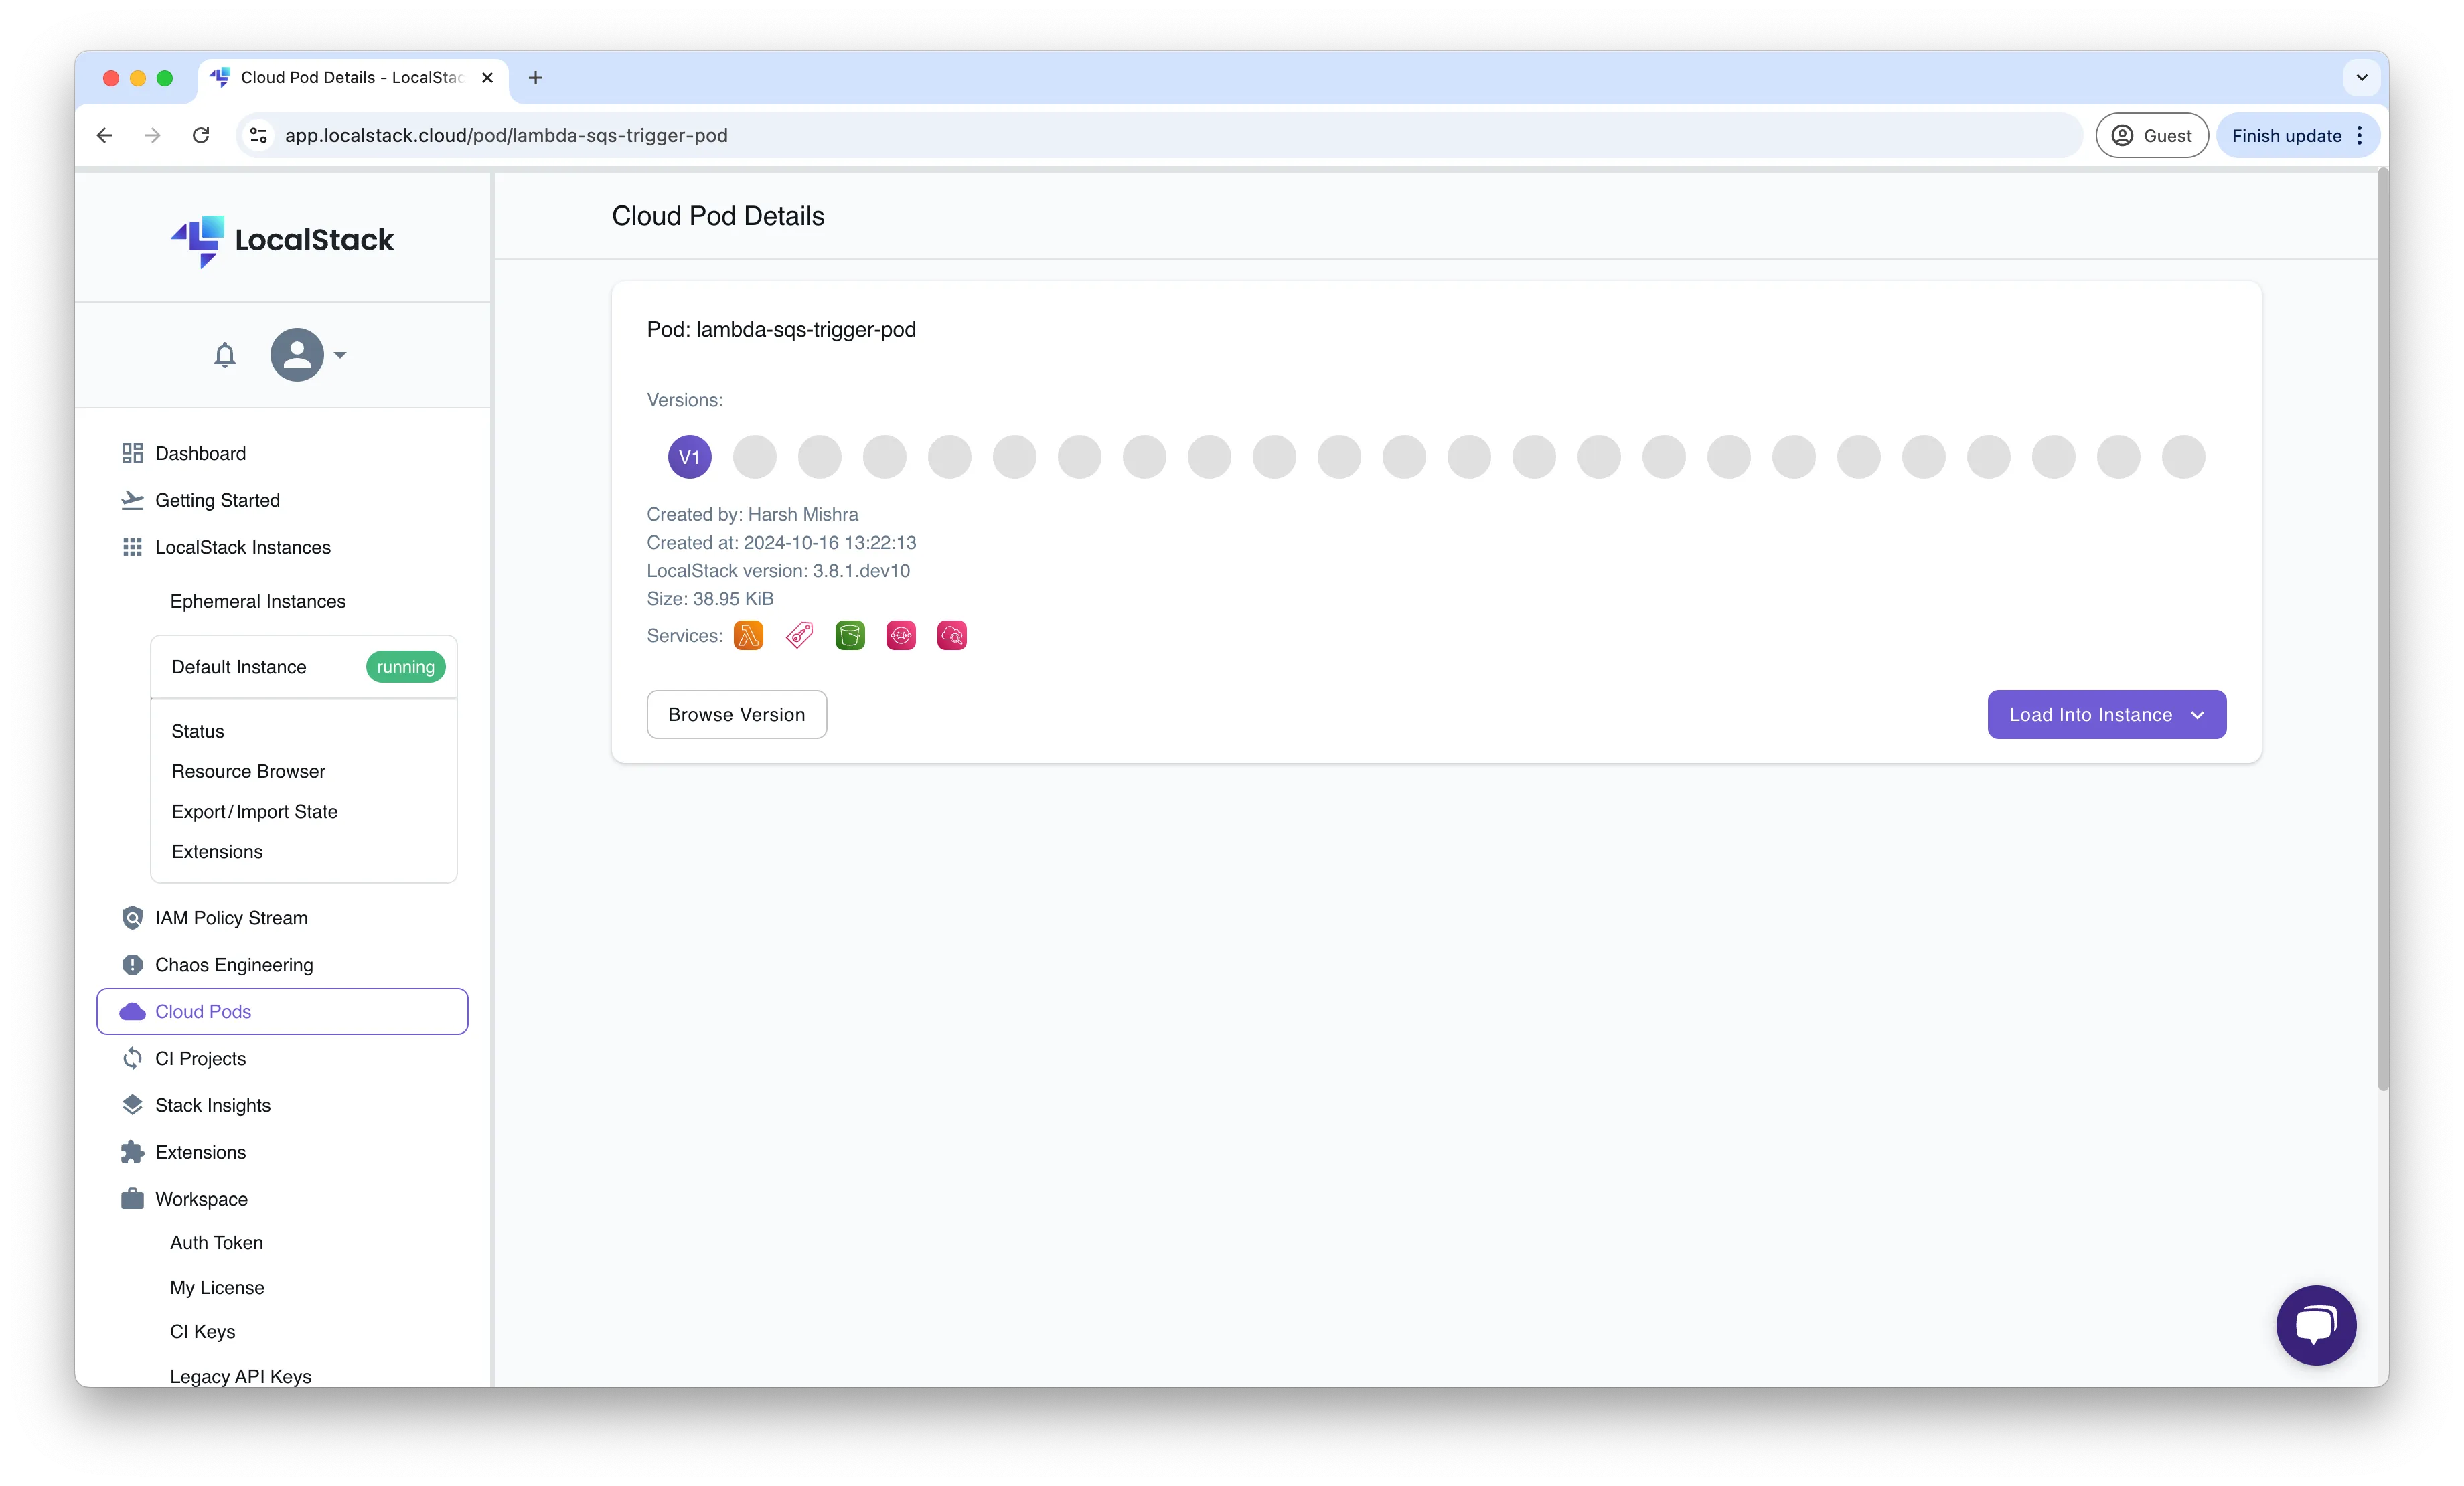
You can add a description to this version of the Cloud Pod using the --message flag or specify particular services to save by using the --services flag with a comma-separated list of services.
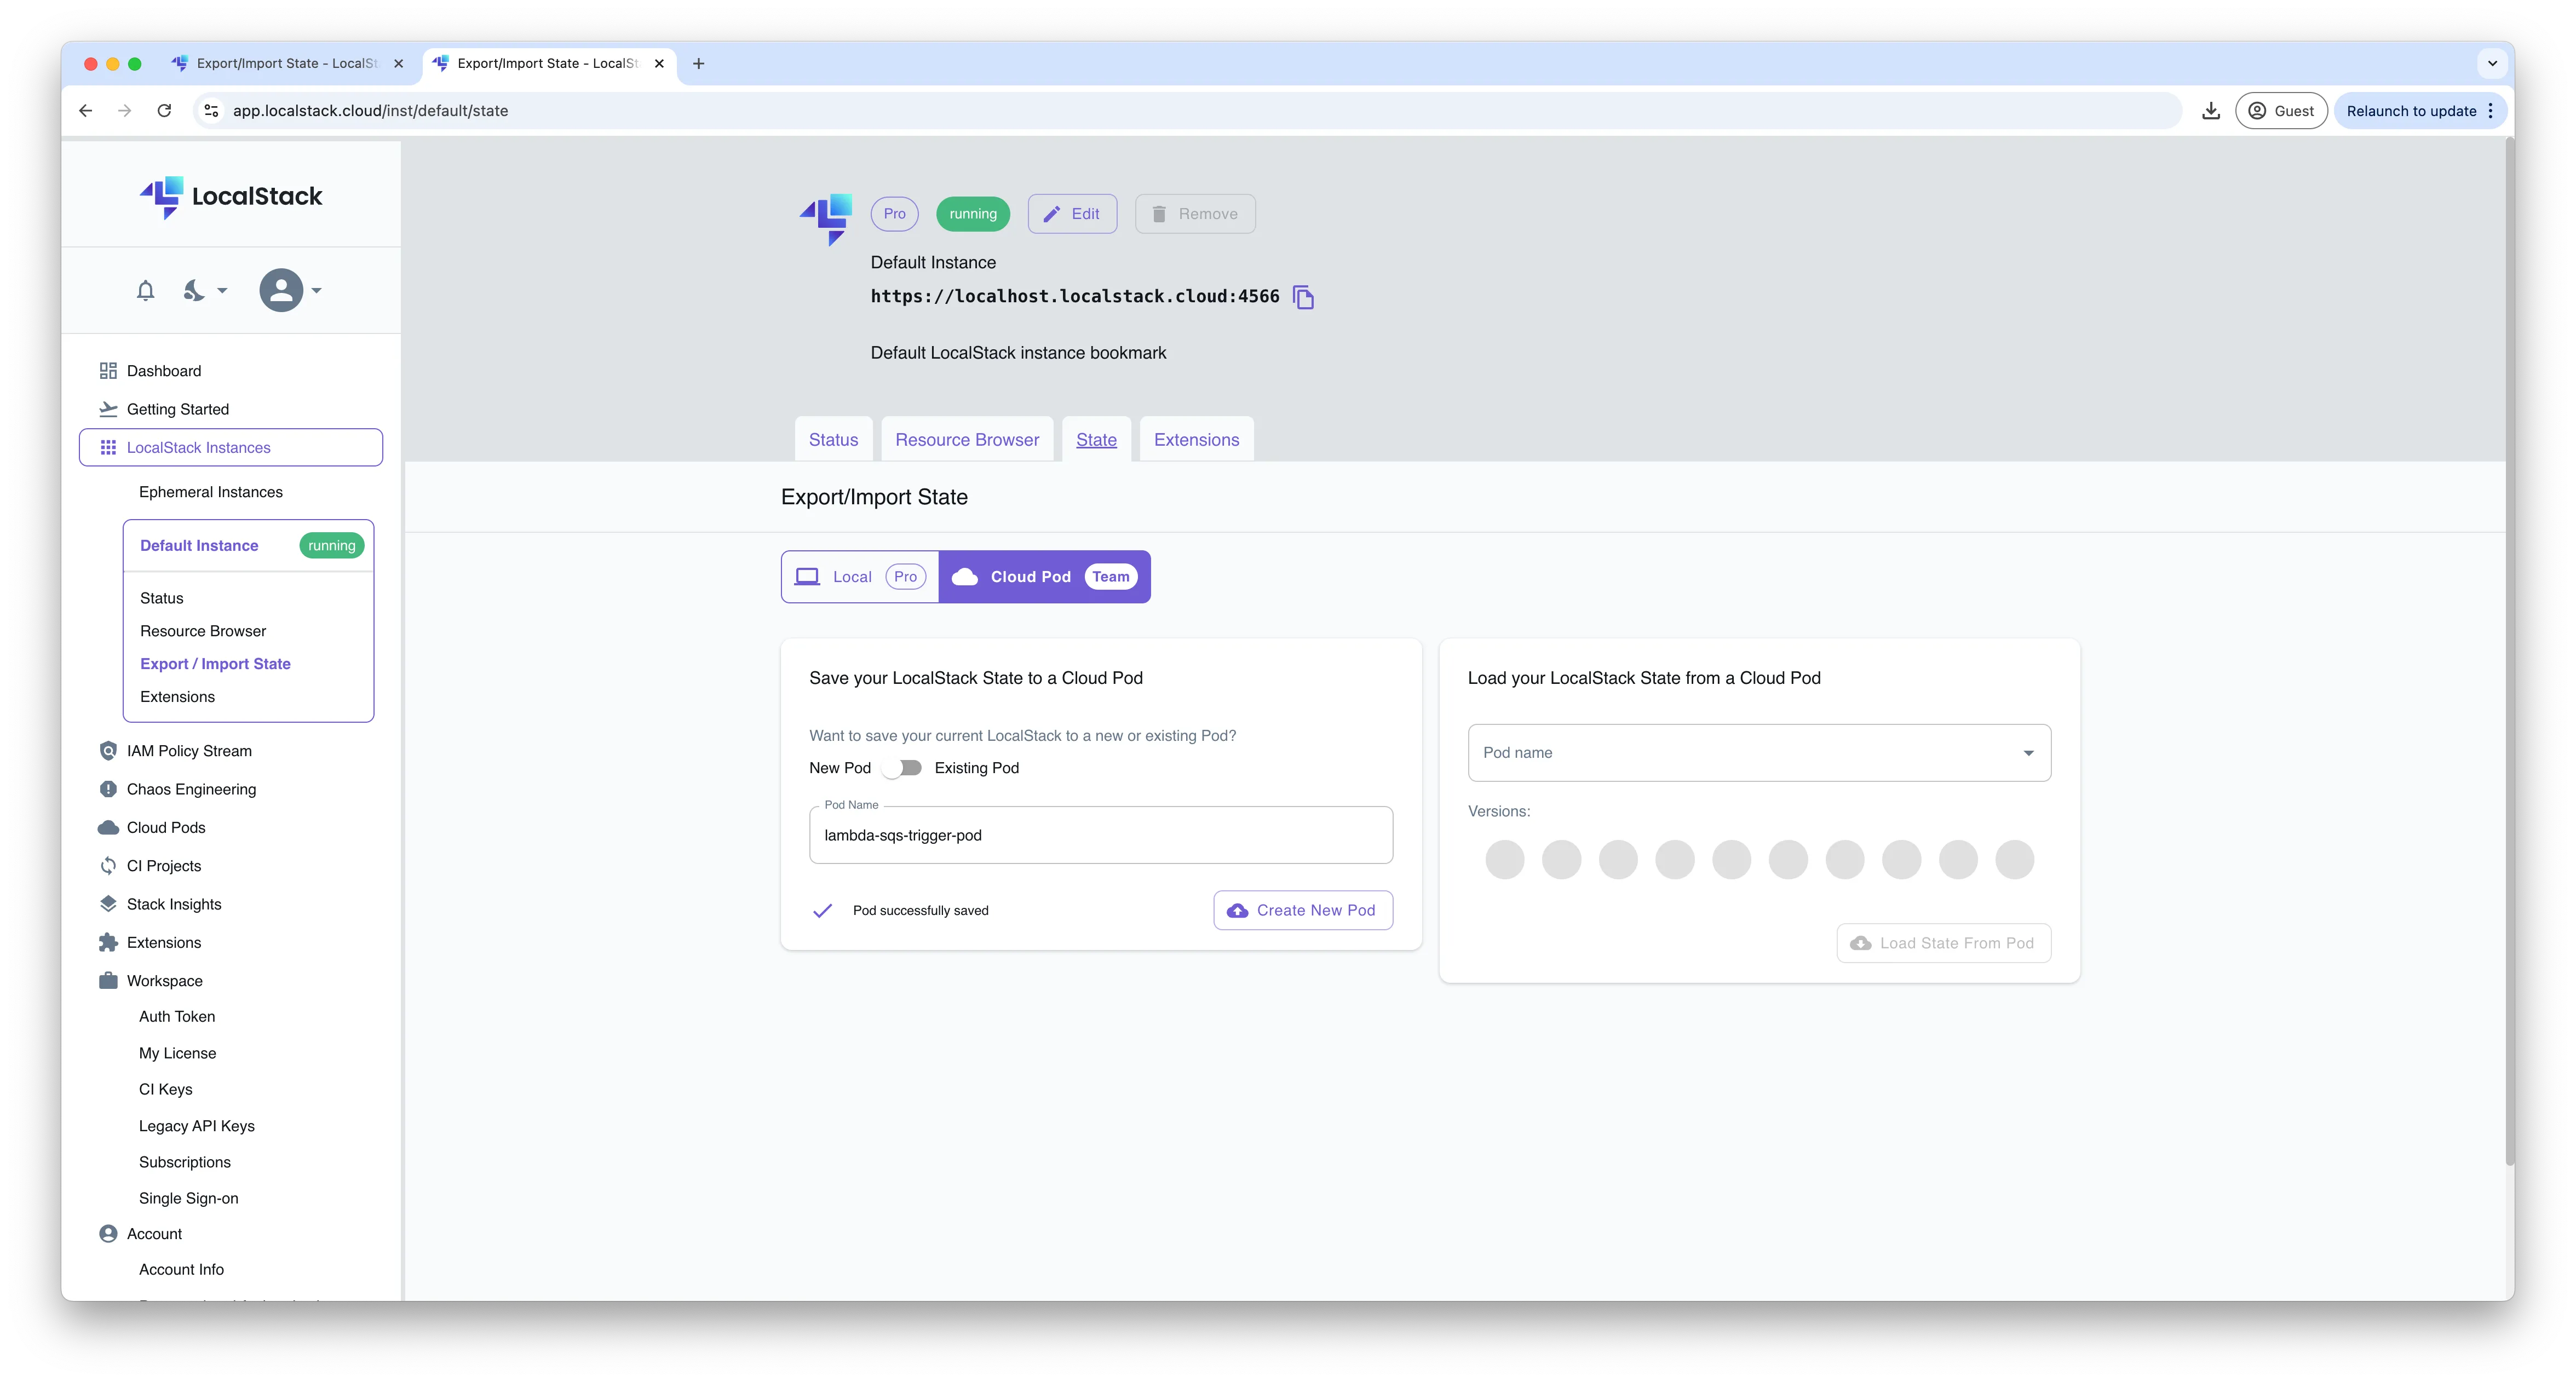
Alternatively, you can use the LocalStack web application to save state by navigating to the Cloud Pods tab, entering a Cloud Pod name, and clicking on Create New Pod.
Load the infrastructure state
Before loading the state, restart the LocalStack container to ensure it starts from a clean slate:
localstack restartTo load the saved state, use the localstack CLI’s pod load command:
localstack pod load lambda-sqs-trigger-podThe output should look like this:
Cloud Pod lambda-sqs-trigger-pod successfully loadedIf you want to see the changes that would occur without actually applying them, use the --dry-run flag:
localstack pod load lambda-sqs-trigger-pod --dry-run
This load operation will modify the runtime state as follows:────────────────────────────────────────────────────── sqs ──────────────────────────────────────────────────────+ 1 resources added.~ 0 resources modified.────────────────────────────────────────────────────── sts ──────────────────────────────────────────────────────+ 1 resources added.~ 0 resources modified.──────────────────────────────────────────────────── lambda ─────────────────────────────────────────────────────+ 1 resources added.~ 0 resources modified.────────────────────────────────────────────────────── s3 ───────────────────────────────────────────────────────+ 1 resources added.~ 0 resources modified.
You can also load the Cloud Pod using the LocalStack web application. Simply navigate to the Cloud Pods tab, specify the Cloud Pod name, and click on Load State from Pod.
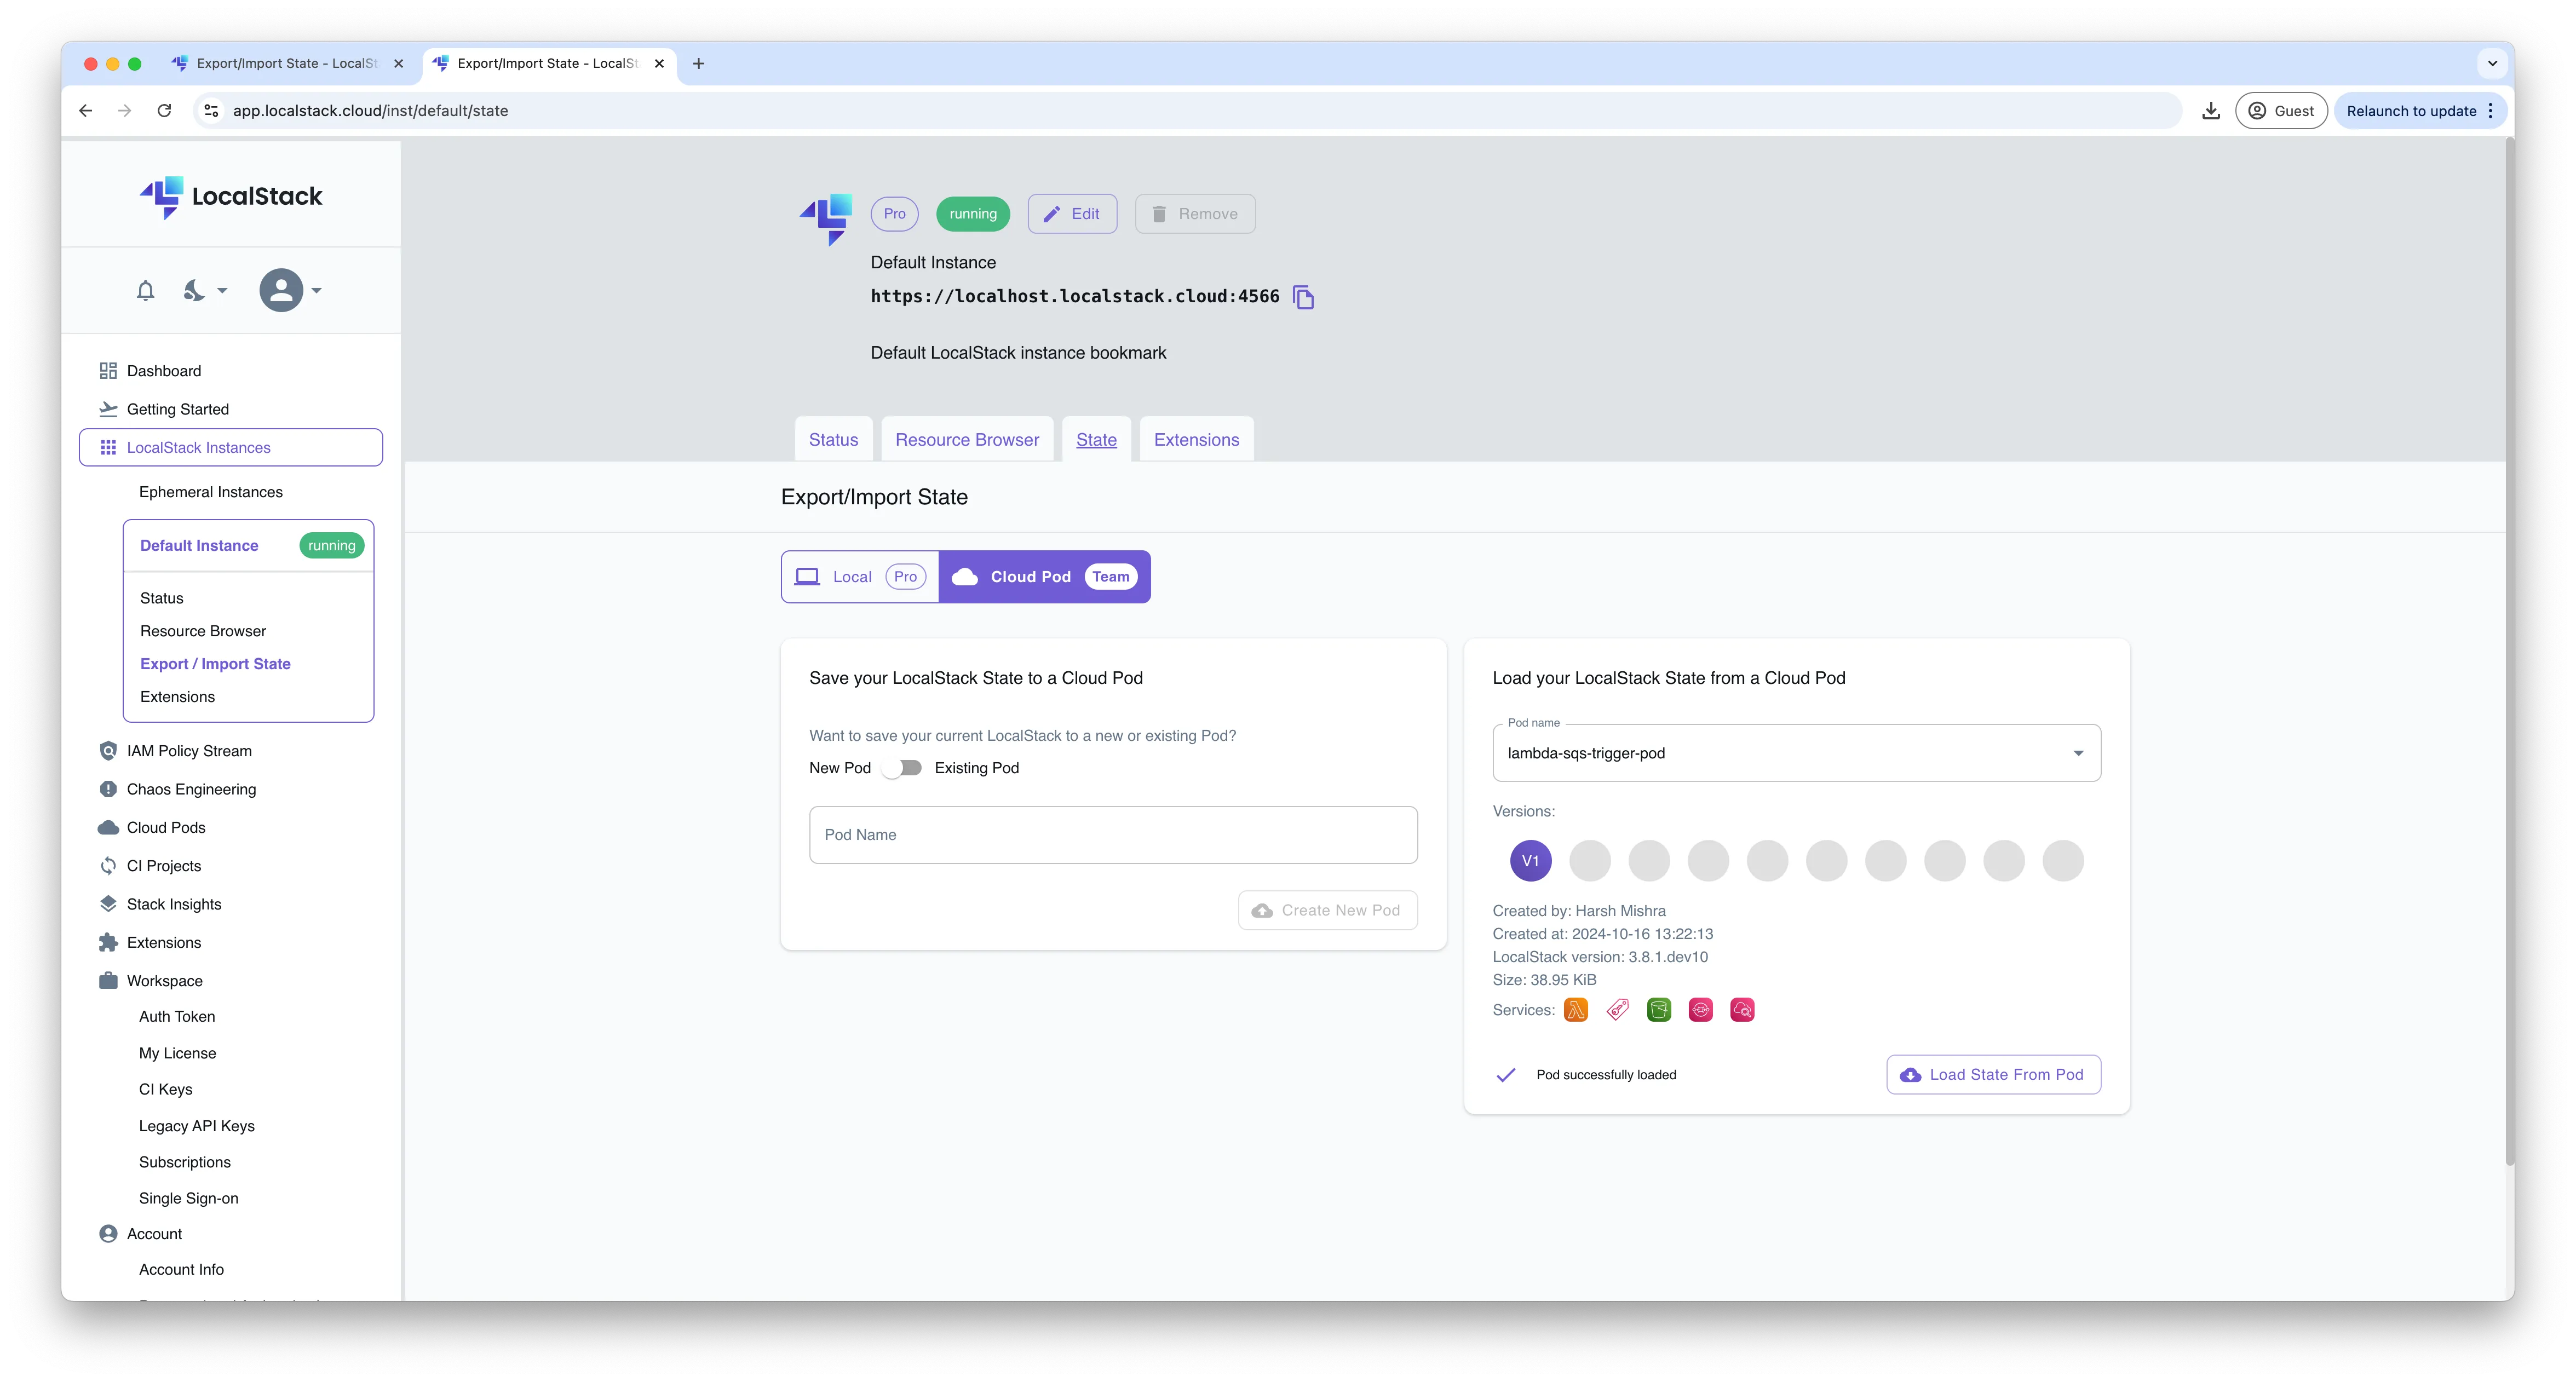
Automatically loading the Cloud Pods
For scenarios where you want Cloud Pods to load automatically, you can use the AUTO_LOAD_POD configuration variable. This variable allows you to specify the names of Cloud Pods, separated by commas, which LocalStack will then load sequentially at startup.
To automatically load the lambda-sqs-trigger-pod each time the container starts, you can use the following command:
AUTO_LOAD_POD=lambda-sqs-trigger-pod localstack startIn the logs, you will be able to see the following:
2024-10-11T06:24:29.613 INFO --- [et.reactor-0] localstack.request.http : PUT /_localstack/pods/lambda-sqs-trigger-pod => 2002024-10-11T06:24:32.849 INFO --- [-functhread5] l.p.c.persistence.manager : Loading state for sts took 14 ms2024-10-11T06:24:32.938 INFO --- [-functhread5] l.p.c.services.s3.provider : Using /tmp/localstack/state/s3 as storage path for s3 assets2024-10-11T06:24:33.113 INFO --- [-functhread5] l.p.c.persistence.manager : Loading state for s3 took 263 ms2024-10-11T06:24:33.157 INFO --- [-functhread5] l.p.c.persistence.manager : Loading state for cloudwatch took 45 ms2024-10-11T06:24:33.205 INFO --- [-functhread5] l.p.c.persistence.manager : Loading state for sqs took 48 ms2024-10-11T06:24:36.824 INFO --- [-functhread5] l.p.c.persistence.manager : Loading state for lambda took 3618 msReady.Limitations
Cloud Pods share similar limitations with the State Export & Import feature. They are not backwards compatible, and each new version release may break existing Cloud Pods unless you are pinned to a specific version. Additionally, not all services and data can be saved and loaded, as detailed in the documentation.
Conclusion
We’ve explored Init Hooks, Export & Import State, and Cloud Pods as three methods to load state into your LocalStack container without needing to manually deploy a stack or similar processes.
While we’ve discussed the key concepts and limitations of each method, you can combine them effectively. For example, you might use Init Hooks to save a state file or a Cloud Pod during every shutdown phase to preserve your work or share it with your colleagues. Or, Init Hooks can be used to pre-seed some resources, while state files or Cloud Pods manage test data depending on the testing scenario.
Ultimately, you can select the most suitable method to load and manage your state based on the setup you wish to build upon. In future tutorials, we will dive into specific use cases for each method, helping you maintain consistent, reproducible, and easy-to-manage development environments.


